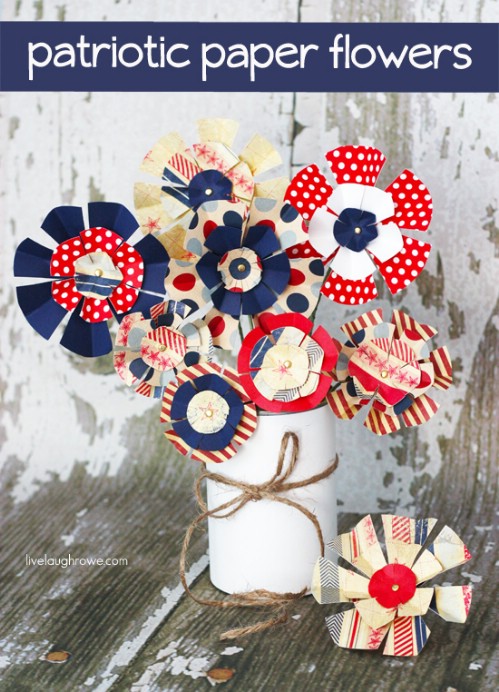
Patriotic Paper Flowers
Make paper flowers that you can use to decorate your dinner table, deck or anywhere you need just a bit of patriotic flair. You'll need scrapbook paper, floral stem wire, washi tape and some stencils or you could use different sized bowls to mark off where you need to cut. You may also want some wooden dowels if you are planning to add your flowers to a vase for a centerpiece or you could string them together with twine or yarn and create a banner with them. They are very easy to make and if you have scrapbook paper in various reds, blues and whites they won't cost you anything.
DIY Instructions and Project Credit – Livelaughrowe
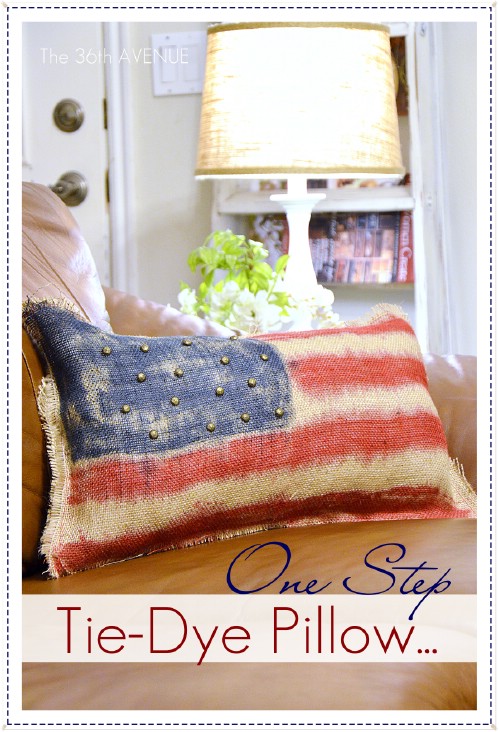
Tie Dye Patriotic Pillow
Oh, how we love to tie dye. This beautiful pillow is a great tie dye project even for beginners. It's made of burlap which gives it that great rustic look and you can attach metal buttons or studs for the stars to make it even more rustic looking. You just have to choose the colors or mix them yourself if you are an avid tie dyer and then mark off where your stripes should go as well as where your blue should be for the starred section. This is such a pretty pillow that you are going to want to display it long after the 4th has come and gone.
DIY Instructions and Project Credit – The36thavenue
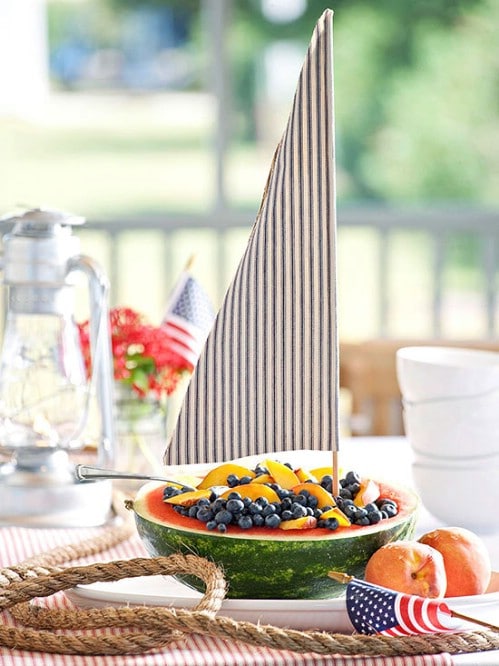
Fruit Salad Sailboat
Ok, so technically this is a food and not just a craft but we had to include it because it's just so cute. It's a little sailboat made out of watermelon. You just have to cut the watermelon and then add a sail and use fruit to fill. This will make an excellent centerpiece for your Independence Day dinner table or any outdoor gathering that you may be attending. Plus, if you were planning to take along a fruit salad anyway, you just have to add a sail on a dowel rod and you're all set.
DIY Instructions and Project Credit – Bhg
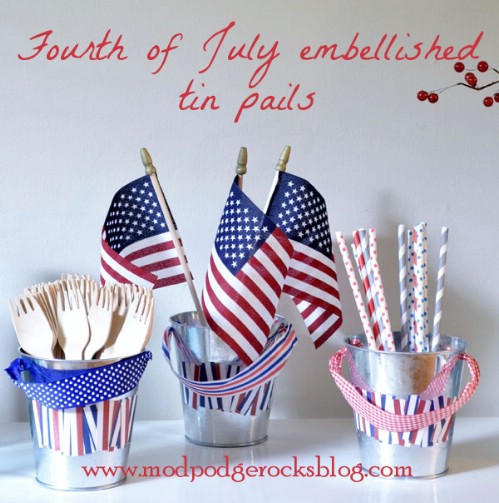
Embellished Tin Pails
These tin pails are absolutely adorable and so easy (not to mention cheap) to make. You can find tin pails at the Dollar Store for around $1 or less a piece and then you just need scrapbooking paper and some mod podge. Create whatever design you want using your red, white and blue scrapbooking paper and then just add a colorful ribbon for a handle. These are great for holding silverware, straws or other items on your cookout table or you could add flowers to create a beautiful centerpiece with them.
DIY Instructions and Project Credit – Modpodgerocksblog
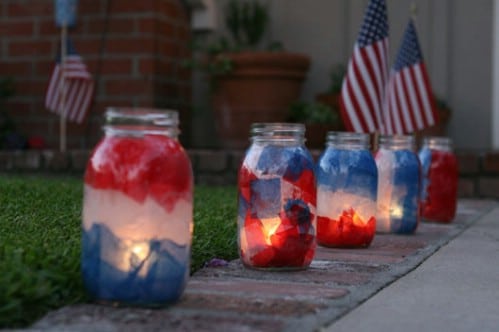
Mason Jar Luminaries
You can make patriotic luminaries with mason jars, mod podge, crepe paper and paint. The jars will be red, white and blue and when you add candles to them they will light up the pathway to your door or you could use them to light up your deck or backyard for 4th of July cookouts. These are so easy to make and can be done in any design that you want. Best of all, they're cheap. If you already have mason jars on hand and craft supplies, you just need tealight candles which you can get at the Dollar Store for around $1 for 6 or so.
DIY Instructions and Project Credit – Fortheloveof
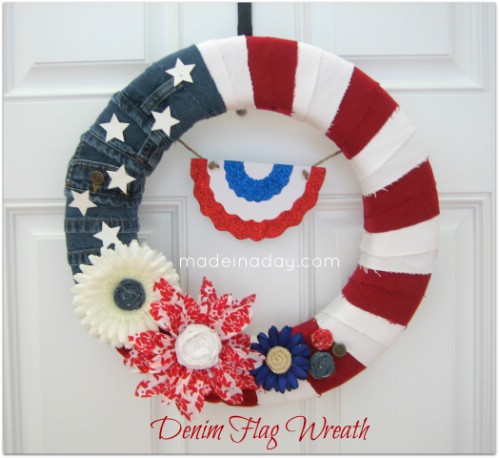
Denim Flag Wreath
This denim wreath is perfect for adorning your door on Independence Day. You will need some denim (this is a great way to get rid of torn jeans or shorts) in blue and red as well as twine, some silk flowers or other decorations and a patriotic banner that you can buy or make. You also need a wreath form which you can get at your local craft store. Styrofoam works best. You need a hot glue gun to keep it all together. Decorate it however you want but the flag design is so great and it will only take you an hour or so to complete.
DIY Instructions and Project Credit – Madeinaday
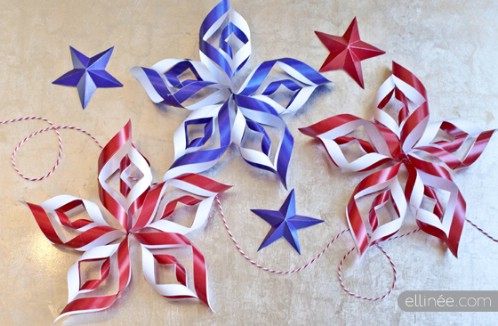
4th of July Paper Stars
These paper stars are the perfect way to dress up the deck or backyard for an Independence Day celebration. You will need red, white and blue forms printed on text weight paper, a hot glue gun and scissors. Once you have the forms printed off, just cut them appropriately and then assemble your stars using hot glue to hold them together. These 3D looking stars are great strung up on ribbon or rope and you can hang them anywhere that you need a little extra decoration. You can print off the free templates and each template gives you a large swirl star and a smaller, solid colored relief star.
DIY Instructions and Project Credit – Elli
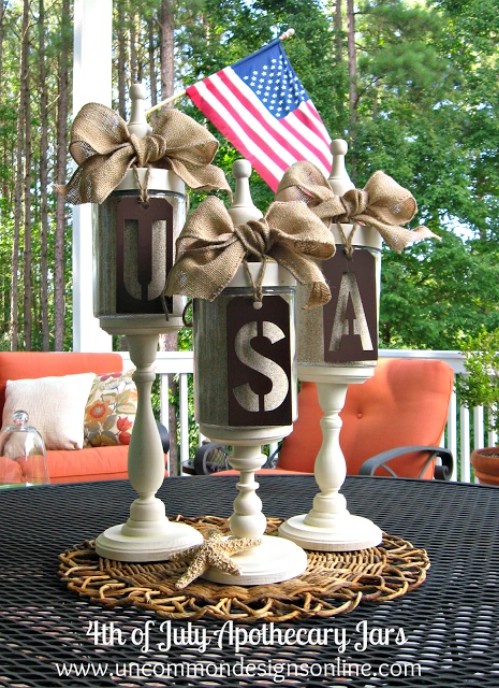
Apothecary Jars
These apothecary jars spell out "USA" and have a wonderful beachy feeling to them. You will need apothecary jars and you can use 3 of the same size or toggle the heights. You also need sand to fill the jars – or whatever you want based on your individual theme. The jars have letters that are actually brown metal tags which you can pick up at most craft stores or you could paint on the letters if you wanted. Wrap it all up with burlap bows or tie a nice patriotic bow around the base of each jar. This is a fully customizable project that you can do however you want.
DIY Instructions and Project Credit – Uncommondesignsonline
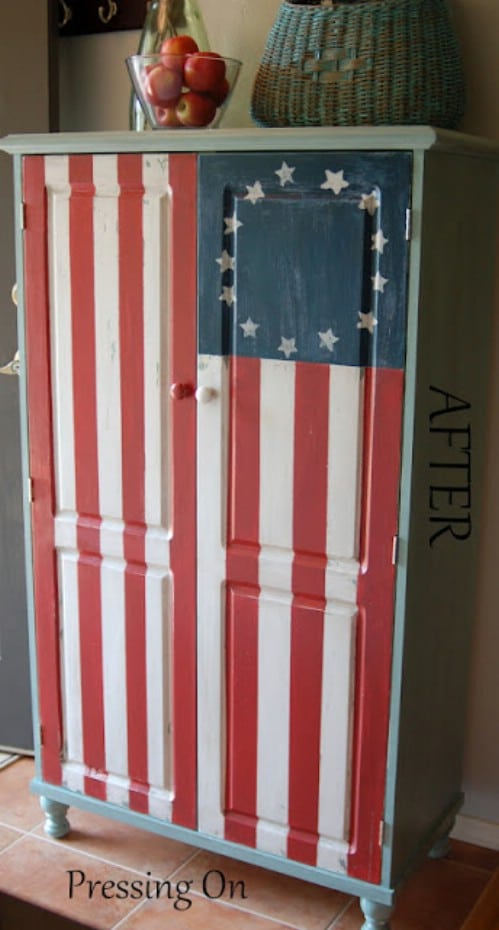
Betsy Ross Painted Cabinet
So how about going all-out in your celebration and painting this beautiful Betsy Ross cabinet? If you have a cabinet or dresser that needs a little facelift anyway, this is a wonderful way to do it. You just need to sand and then paint the stripes and stars on the front. That's it. It shouldn't take more than a couple of hours depending on how good you are at painting and the result is an elegant cabinet that you are certain to love displaying. You can use it for your 4th of July decoration and then display it all year long.
DIY Instructions and Project Credit – Pressingon-miranda
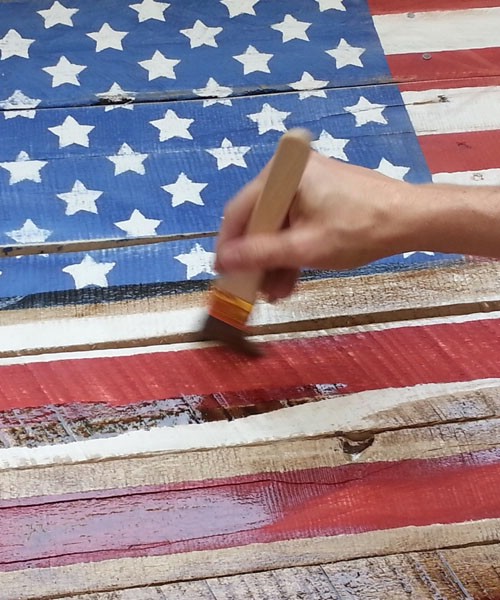
Rustic Pallet Flag
Have we mentioned lately how much we love pallets? Honestly, you can do so many things with a pallet and some places will literally give them to you for free just for getting them out of their way. You can take an old pallet and repurpose it to create a rustic American flag that can be displayed in so many different ways. Just draw out the flag beforehand and then paint. You can use the individual slats for each stripe which makes the painting part really easy and then display your flag on the outside wall or you could even add legs and make it a patriotic table.
DIY Instructions and Project Credit – Planitdiy
No comments:
Post a Comment