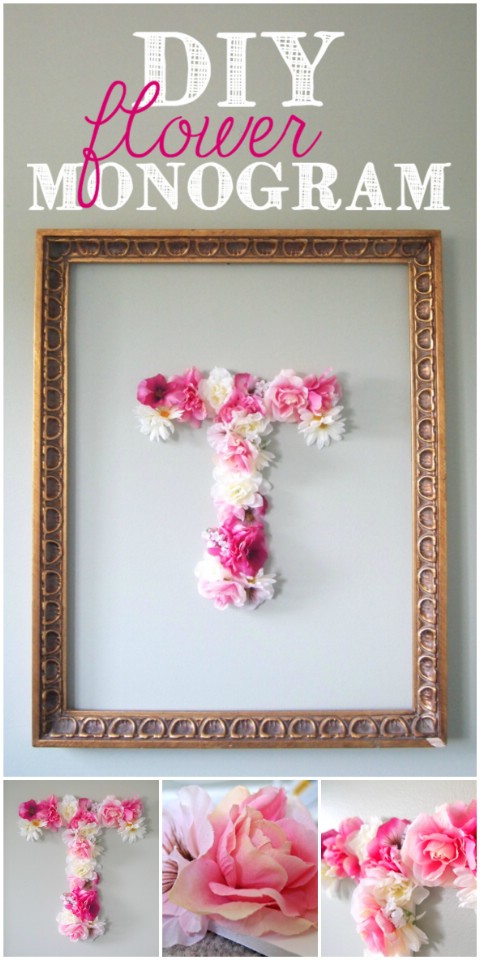
Faux Floral
The use of fake flowers can truly brighten up any room, and it's the perfect decoration for spring or summer. This one is really easy to do since there's no precision cutting or gluing needed, and the final product is so lightweight that you won't have to drill any holes into the wall.
DIY Instructions and Project Credit – Decoist
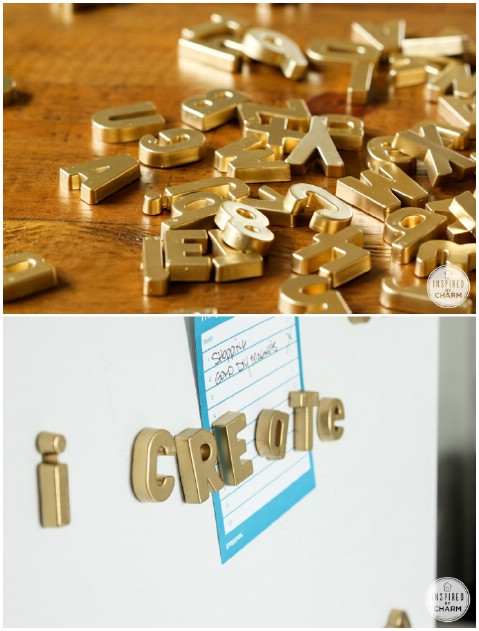
Magnetic Fridge Letters
Remember these colorful magnetic letters from when you were a kid? I know my mom still has ours stashed in a box somewhere so it's about time I go pick them up! I still love the idea of letters on the fridge so that you can leave a little note or something on there, but all the colors are just a little too childlike, so what do you do? Spray paint them, of course!
DIY Instructions and Project Credit – InspiredByCharm
Button Madness
Gluing buttons onto wooden letters is just such a simple task for something so adorable! The colorful approach would look great in a child's room, but if you want it for yourself, I'd suggest getting buttons in different shades of the same color and displaying it in your craft/sewing/DIYing room.
DIY Instructions and Project Credit – BrightStarKids
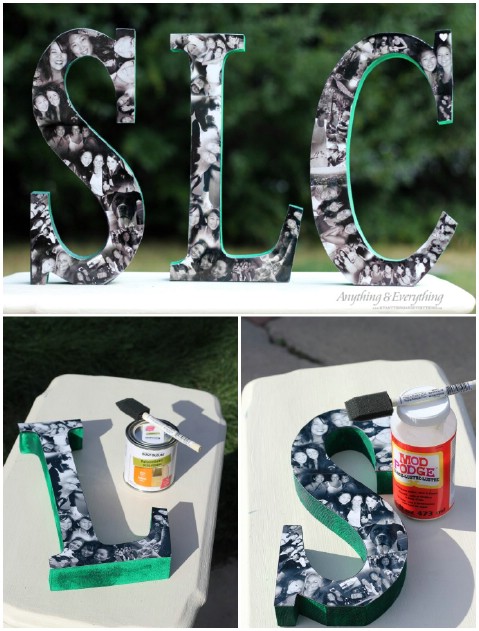
Photobomb
A great way to really personalize the letters or the words you're spelling out is to turn each letter into a photo collage. Getting images onto the wooden letters is a cinch – you just need to print them out (on photo paper, not regular printer paper), glue them onto the wood with Mod Podge and then finish it off with some polyurethane.
DIY Instructions and Project Credit – Myanythingandeverything
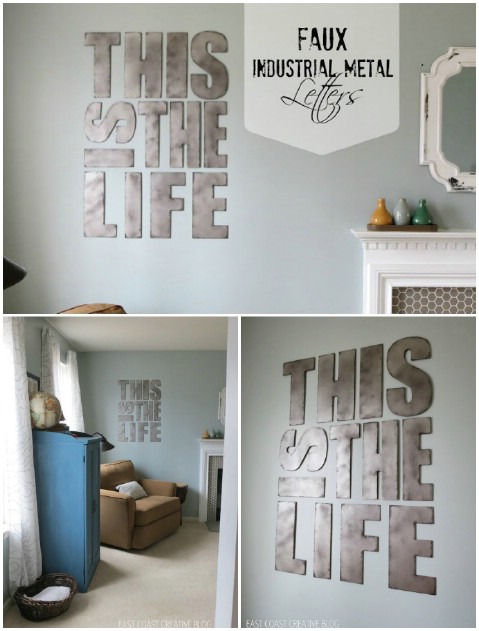
Faux Industrial Metal
Here's a fantastic little cheat that gives you a very realistic metal look at a fraction of what the real thing would've cost you. It's actually a lot easier to pull off than you may think – you just need the right combination of sprays and a very clever finishing technique of black pint sponged around the edges. Brilliant!
DIY Instructions and Project Credit – InfarrantlyCreative
Yarn-Wrapped Letters
Wrapping yarn around wooden letters is honestly one of the easiest ways to decorate them. The ombre effect is also very simple to achieve since you just need a few shades of the same color and type of yarn. You can ombre a single letter like in the image, or if you're spelling out a name or word, wrap each letter in one shade for a more drawn out ombre effect.
DIY Instructions and Project Credit – CatchMyParty
Creative Crayon
I've seen some pretty cool projects that involve melting crayons, but I never thought of cutting them up to create a letter or image. It's cheerful, it's colorful, and it's the perfect addition to a nursery, playroom or classroom.
DIY Instructions and Project Credit – Chic&CheapNursery
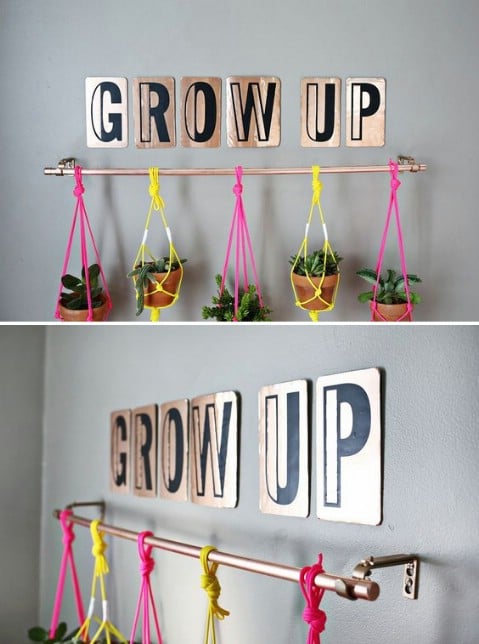
Copper Sheets
I feel as if copper is one of the more underrepresented of the metals, so here's a fantastic way to incorporate it into your home. It's got a bit of a retro feel which makes me love it even more, and it's a very simple yet effective project.
DIY Instructions and Project Credit – ABeautifulMess
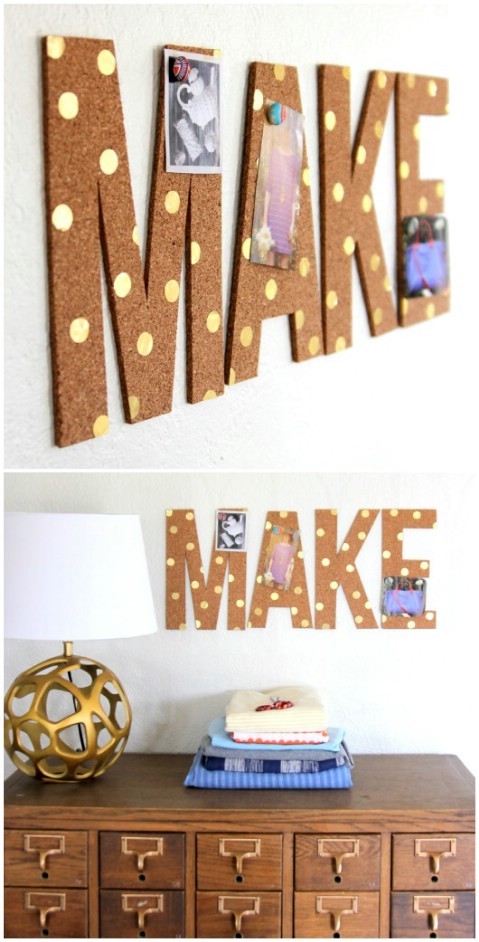
Cork Board Letters
Your letters and words don't have to be purely inspirational or decorative, they can be useful too; this cork board lettering is the perfect example. Not only does it look super cute, but it serves as a little corkboard on which you can pin notes, to-dos, ideas etc.
DIY Instructions and Project Credit – KojoDesigns
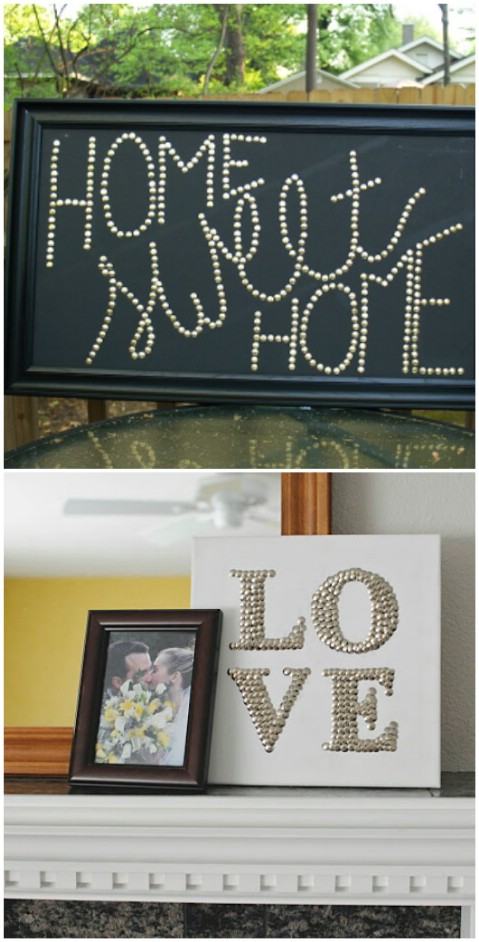
Thrifty Thumbtacks
Thumbtacks? How clever is that? You can just push these babies through a canvas or a piece of foam board to create absolutely any word or phrase you want. It's pretty cheap, super easy, and looks fabulous!
DIY Instructions and Project Credit – Metal&Mud and TheJonesWay
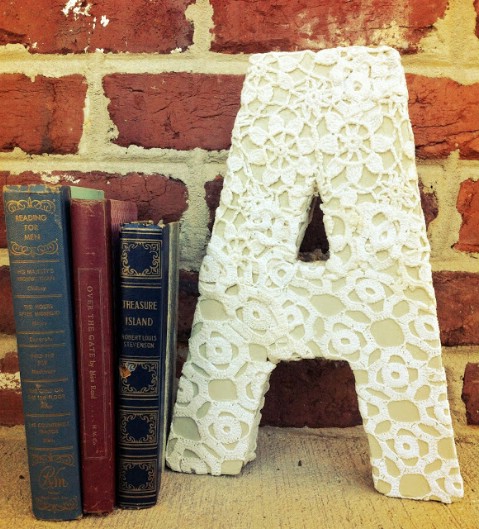
Lacey Doilies
If you like a vintage look then you'll certainly be a fan of this one: wrap your painted wooden letters in lace doilies! That's pretty much all there is to it. You can keep the doilies and letters the same color like in this tutorial, or paint both in their own complementary colors.
DIY Instructions and Project Credit – AveryAndAnderson
Paint Sticks
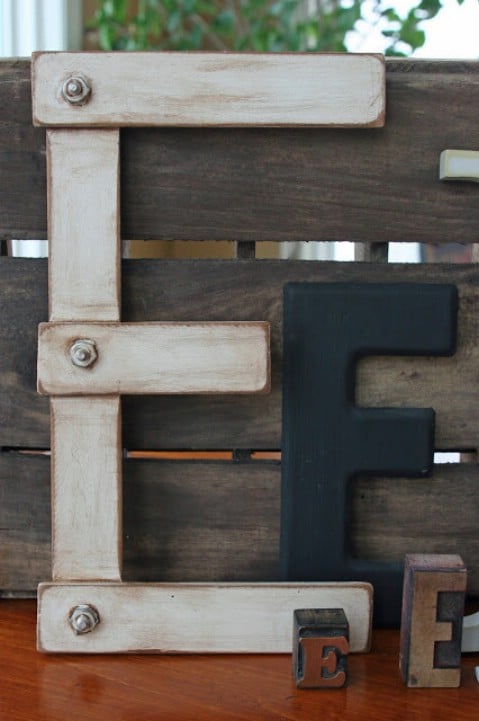
Who would've thought to use paint sticks as material for DIY lettering? It's brilliantly creative and it's a pretty painless process. I really love the exposed nuts and bolts since I'm a big fan of rustic design. Just make sure to plan carefully since your letters need to consist of straight lines with sticks.
DIY Instructions and Project Credit – MamieJane's



No comments:
Post a Comment