My daughter is growing up fast, but her fascination with fairies hasn't gone anywhere. Her room is still pink, sparkly, and filled with Tinkerbell. I guess I can't complain—it makes shopping for her easy.
There are also a lot of really fun fairy crafts out there! I've made her quite a few fairy gifts, and we've done a lot of projects together too. We loved making these fairy houses from empty toilet paper rolls. This fairy lantern project was more challenging, but we had a blast working on it.
I just found the most exciting fairy art project yet, and it looks surprisingly easy!
Watch this video and you'll see the amazing process as an ordinary glass jar is magically transformed into a mushroom fairy house!
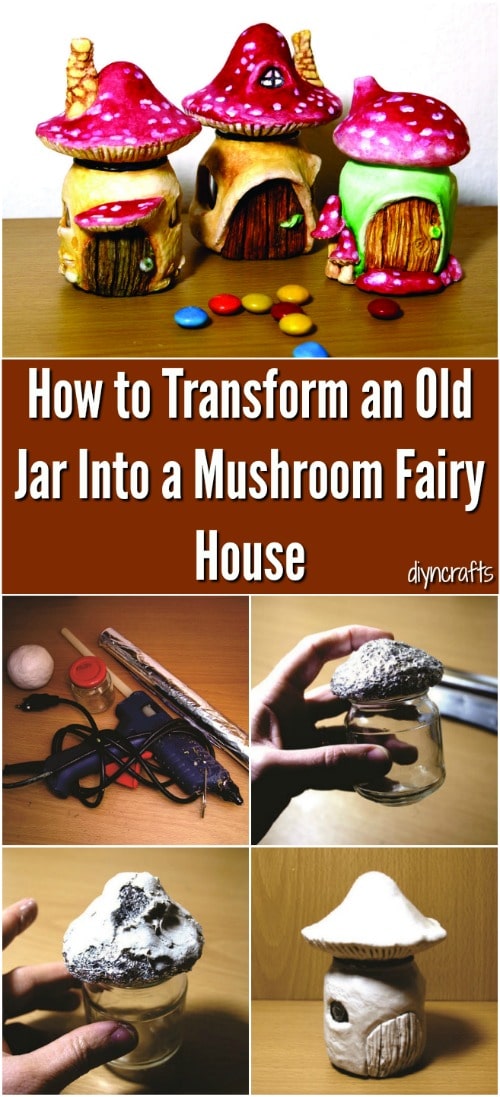
There is a full set of instructions here. Here is a short version of the steps:
1. Gather your materials: tinfoil, an empty jar, a hot glue gun, and some white air-dry clay. You will also need some watercolors (or any other type of paint that you like to use).
2. Shape a mushroom cap out of tinfoil to fit on top of the glass jar. Hot glue it to the top.
3. Apply the air-dry clay to the sides and the top. This is the step where your artistry and imagination come into play. You will need to shape any doors or windows and add in the textures you want. Watching the video is really helpful for understanding this step. Wait for the clay to dry before you proceed to the next step.
4. Paint the fairy house!
This is another step where you can turn to the video for inspiration. Make sure you apply a coat of varnish to seal in the paint when you're done.
This is a fun, easy project you can customize to your heart's content. The finished fairy houses couldn't be more adorable!


No comments:
Post a Comment