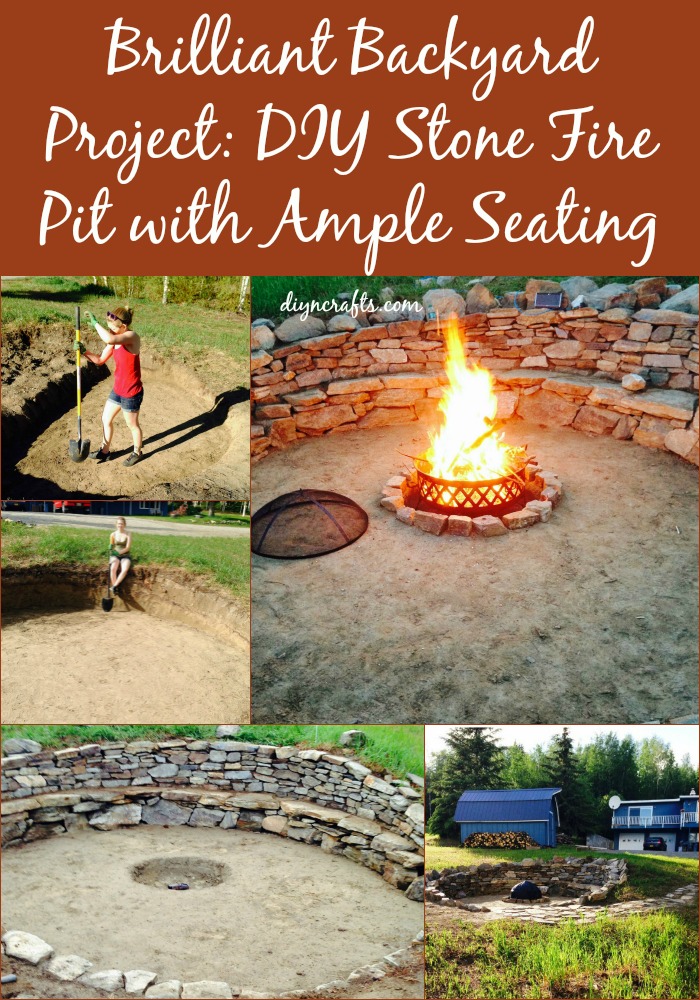
This is one of the most impressive DIY fire pits I've seen; it's almost like an amphitheater, and the time, effort and hard work that went into the building of it truly is remarkable. This isn't a very difficult or complicated project, but it is laborious; if you're planning on replicating this then you need to be aware of this from the very start. Since your friends will, undoubtedly, be enjoying the finished product, you may want to rope them in to help with the process. Make them work for it!
Video Instructions:
Video and Project by MirPandaLee Imgur user.
If you're looking for a fire pit project on a smaller scale, have a look at this mobile pit or this stunning patio pit that you can also make by yourself.
The stones were all salvaged from a quarry, so no money was spent there, but they did spend about $100 for the sand and the metal fire pit enclosure – although both of these are optional, so in theory, you could do this at no cost.
So the job started by digging a hole in the ground.
This was all done by hand so it took quite some time. Luckily, the ground they chose wasn't too littered with roots and rocks so it didn't take quite as long as it could have.
Once it was finally done, their hole was 15 ft. in diameter and tapered down to suit the natural dip in the land. The deepest part was about 3 ft. deep.
After this monumental task they went hunting for stones at a nearby quarry. They searched for four types in particular:
- For the wall: flat, small-medium
- For the seating and pathway: flat, very big
- To line the pit: big with any interesting shape
- To fill any holes or gaps: small, thin and flat
Stacking the stones was simple enough, almost like a giant puzzle; starting first with the massive circular outline, and then stacking upwards. Throughout the stacking process, they used the dirt that they dug out as well as the small rocks to fill in gaps so that everything was sturdy and pretty much level. This took a few weeks to complete. They also dug a mall hole in the middle for the actual fire pit.
Next came the building of the bench with the large stones; this was done in the same manner as the wall: around and then up. Dirt and small rocks were added again to ensure no wobbling with a bit of mortar added under just one pesky wobbly stone.
The last big job was creating the pathway from the house to the pit; here they first laid out the stones and then dug holes respectively to fit them in flat and level to the ground.
Finally, they assembled a ring of stones around the fire pit, put the metal enclosure in, lit it up and basked in the glory of their hard work! They later added some sand to the ground as a matter of personal taste, but if you want to save money you can certainly leave this part out. So far, the structure has made it through an entire Alaskan summer, winter and spring melt, so all in all, I'd say it's a pretty successful build!


No comments:
Post a Comment