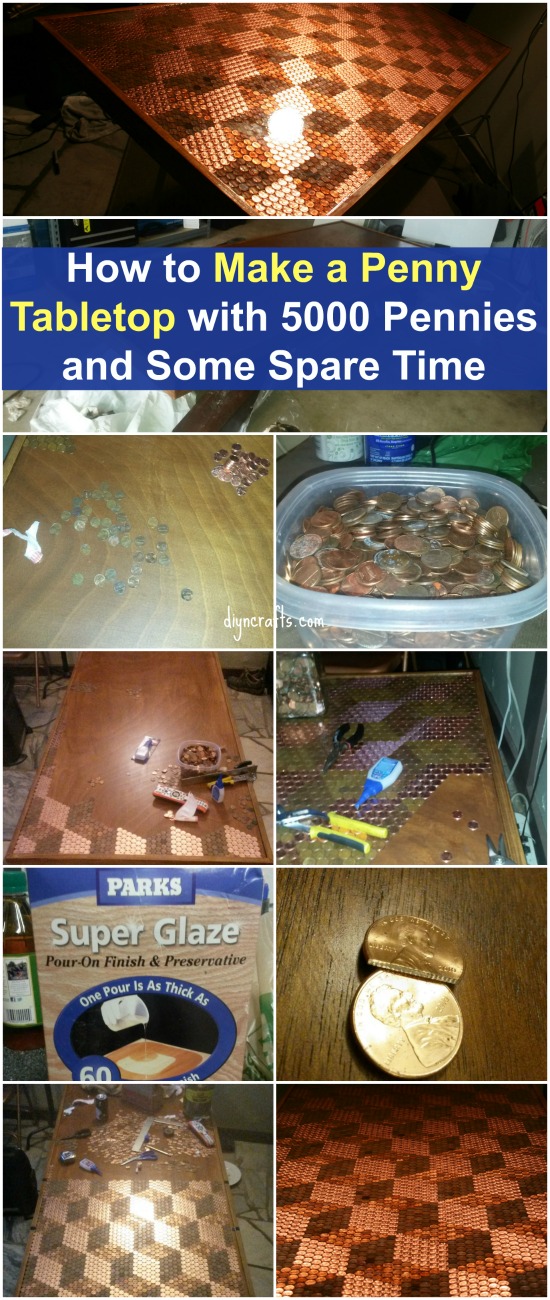
Are you one of those types of people who store all your unwanted pennies in a big jar at home? I am. I absolutely hate having jingling coins in my bag that only serve the purpose of seriously weighing down my handbag, resulting in sore shoulders – all because I'm carrying around a bunch of coins that I'm not going to use anyway. So here's the perfect use for all those unwanted pennies: an awesome tabletop decoration!
If you don't already have a table that you're willing to glue pennies onto, find yourself the perfect-sized second hand one, or, if you want a larger dining table, you could get a solid core birch door. Whatever you decide on, it needs to have a trim around the edge. And remember, if you're not a fan of the wood color, you can just stain it – a darker color matches better with the copper of the pennies.
Instructions:
Sort your pennies into three piles according to their levels of brightness. Then get yourself a clear adhesive with which to glue the pennies; Loctite is a good option to go with.
Start gluing your pennies to the tabletop. The best method to do this and keep your lines straight is to work in diagonal lines; making sure your angles are correct will help you to end up with perfect shapes. The diagonal line should be at a 30° angle from the center line and a 60° angle from the perpendicular front edge.
The chances that you'll be able to perfectly fit in all your pennies is slim, so you'll most likely have to cut some pennies to fill the edges; for this you can use a pair of aviation snips.
Once all that time-consuming gluing is all done, it's time to glaze! Your best bet is a two-stage gloss epoxy that has both a resin and an activator. Pour it over the entire tabletop, spread evenly, and use a hair dryer to get rid of any bubbles that could ruin all your hard work. This why you need that trim – it'll capture and hold the glaze when poured.
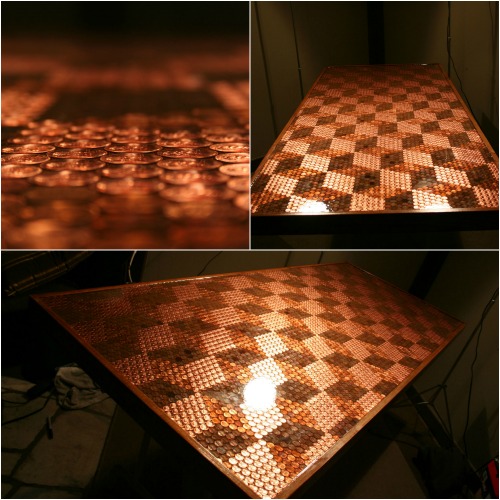
Once that's all done and dried, you'll be left with this incredible, shiny and heavy DIY tabletop that everyone is sure to marvel at. Of course, you don't necessarily have to go with this exact cube-like design, you can come up with your own thing. Just be sure to plan it out perfectly before you start any gluing. You don't want to get halfway only to notice that it doesn’t quite work out!
Created and Shared by Reddit User Callofthegame


No comments:
Post a Comment