Saturday, December 31, 2016

Homemade Moisture Therapy to Heal Chapped Lips

Homemade Moisture Therapy to Heal Chapped Lips

Chapped lips can be painful and unsightly. During the winter months, many people experience dry, chapped lips and some even suffer through the summer months when air is dry and hot. If you have chapped lips, there are many over the counter lip balms that you can try or you can choose the homemade remedy way.

One great remedy for chapped lips is to simply apply petroleum jelly or coconut oil right before going to bed. While you sleep, the petroleum jelly will moisturize your lips and leave them silky smooth by the time you wake up.

You can also use Vitamin E. If you have any Vitamin E capsules, just open one by puncturing it with a pin and then apply it to your lips.

Drinking water will also help to prevent chapped lips. Drink at least eight glasses of water every day to keep your entire body hydrated which will help to prevent dry lips and skin.

It is important that you do not lick your lips frequently. While it would seem that licking them would add moisture, it actually dries them out. Keep lip balm or Vaseline on your lips to prevent yourself from licking and to add moisture.

Honey contains great antibacterial properties that can help to heal chapped lips. Try this homemade honey and Vaseline remedy:

• Wet your lips slightly with warm water
• Apply just a thin coating of honey and allow it to dry for just a couple of seconds
• Put Vaseline over the honey and leave for at least 15 minutes
• You can remove the Vaseline with a cotton swap and a bit of warm water
• This remedy can be used every day to help hydrate and heal lips and to prevent chapping in the future

3 Effective DIY Methods to Get Rid of Spiders in Your Home

3 Effective DIY Methods to Get Rid of Spiders in Your Home

Can I just say that I absolutely hate spiders? Really, they scare me half to death and keeping them out of my home is critical. If you feel the same way or if you just really don't like those little critters hanging around, there are a few effective and all-natural ways to keep them away.

First, peppermint is very effective. Spiders simply hate peppermint so placing just a few drops of peppering essential oils into a spray bottle, adding a little liquid dish soap and filling with water gives you an excellent remedy for ridding your home of spiders. Spray this mixture around your windows and doors and just anywhere that you think they may be crawling around.

You can also use vinegar and coconut oil. Mix the two together into a spray bottle and spray around doors and windows, in the shower and under beds.

Finally, spiders also tend to dislike citrus oils. Lemons, limes and oranges are great essential oils to spray around if you want a fresh clean smell and a home free from spiders.

Energy Saving Tips – 35 Ways to Save on Your Utility Bill

Energy Saving Tips - 35 Ways to Save on Your Utility Bill

Everyone needs ways of saving money from time to time and one of the most costly expenses for most households is the electric bill. particularly during the summer or winter months when you run your air conditioning or heating unit a lot, it is important to know ways of bringing down costs associated with electricity. There are many things that you can do to save electricity and ultimately save money. Most of these take very little time and cost nothing.

  1. Turn down the thermostat – Or turn it up depending on the season. By turning your thermostat just 3 degrees up or down, you can save about a hundred bucks each year. If you normally keep it on 69 during the summer for instance, turn it up to 72. You won't really notice the difference in temperature but you will notice it on your energy bill.
  2. Check your windows – Make sure that you keep your curtains or window blinds closed on really sunny days to keep out the sun and prevent your air conditioner from running. During the winter months, keep the curtains and blinds open to allow sunlight in which will keep your home warmer naturally.
  3. Unplug when not in use – When you are not using electronics, unplug them. Even when they are turned off, they will continue to use energy if they are plugged in.
  4. Check for air leaks – Leaks around doors and windows can cause your heating/cooling unit to work overtime. Ensure that all windows and doors are properly closed and that there are no leaks allowing outdoor air inside.
  5. Change your light bulbs – There are a number of energy efficient light bulbs on the market and while they may be a bit more expensive initially, they will help you to save hundreds on your light bill over the course of a year or so.
  6. Change filters regularly – Keeping your heating and cooling unit properly maintained is essential. Make sure that you change your filters regularly to keep the unit from overworking.
  7. Choose appliances wisely – If you are buying new appliances, make sure that you are getting energy efficient models.
  8. Use smaller appliances – Larger appliances will naturally use more energy. Simply using the microwave as opposed to the electric oven a couple of times each week or choosing smaller lamps instead of using your overhead lights will help you to save as well.
  9. Turn down the heat – Turning down your water heater to 120 degrees will help you to save every year as well.
  10. Insulate – Make sure that you have adequate insulation, not only in your walls but around your water heater as well.
  11. Choose cold water – When washing clothes and doing other tasks, choose cold water when you can to help lower energy usage.
  12. Use lids when boiling – When you try to boil water in an uncovered pot, it takes longer which takes more energy. Putting a lid on the pot will bring water to a boil faster and save electricity. Just remember to keep an eye on the pot so that it doesn't boil over.
  13. Turn off the oven – When baking, turn your oven off about ten minutes before the cooking time requires and let the heat that is still in the oven finish baking your foods.
  14. Use a pressure cooker – Pressure cookers are not only convenient, they are efficient. You can cook in less than half the time and save time and money.
  15. Fill it up – Always make sure that your dishwasher and washing machine are full before you run a load. Washing smaller loads uses energy that you could save by just waiting until you have enough for a full load.
  16. Set the right temperature – Make sure that your freezer and refrigerator are set at the right temperatures.
  17. Don't open the door – Unless you are reaching in for something, never repeatedly open and close the refrigerator. Make sure that you know what you are going after before you do open so that cold air does not escape and cause the fridge to run more than it should.
  18. Placement is important – Your freezer and/or refrigerator should be placed away from your stove and preferably in an area that does not get direct sunlight.
  19. Check the seals – Your fridge door should seal airtight. If it does not, you may need to replace the rubber seal that keeps cold air in and warm air out.
  20. Clean the lint trap – Keeping the lint trap in your dryer clean is not only good fire prevention, it can also help your dryer to run more efficiently.
  21. Use a clothesline – There is nothing better than freshly dried clothes from a clothes line. If weather permits, hang clothes outside to dry and save the energy that your dryer would use.
  22. Turn the water off – When shaving or brushing your teeth, don't allow water to run unless you are actually using it for rinsing.
  23. Repair leaky faucets – Faucets that leak not only waste water, they waste the energy that it takes to heat water. Make sure your faucets are operating properly without leaks.
  24. Turn off the lights – Your mother probably told you to turn off the lights when you are leaving a room. This rule still applies. Always turn off lights when leaving a room and during the daytime, leave lighting off and just use natural light to see.
  25. Cook outdoors – During summer and anytime it's warm enough, use your outdoor grill to cook instead of kitchen appliances. Not only does this save energy, it's tasty.
  26. Paint the roof – Studies have shown that by simply painting your roof white, you will use up to 40 percent less energy to cool your home. This means you could save more than $100 every year just by painting the roof white.
  27. Check your bill – You should always check your electric bill to make sure that it is accurate. Pay attention to the usage that is reported on your bill and monitor that against your meter to make sure that you are not paying for energy you are not using.
  28. Use a fireplace – During the winter months, use a fireplace if you have one to help heat your home without having to increase your thermostat temperature.
  29. Bake at night – During the warmer months, it is best to bake at night when outdoor temperatures are lower.
  30. Dust – Keeping light bulbs dusted will help them to better light your home and keep them more energy efficient. Once each week, take a feather duster to overhead lights and lamps to remove dust.
  31. Use the dishwasher – Ok, so this one is a double benefit. If you have a dishwasher, it is actually more energy efficient to use it than it is to wash dishes by hand. And of course, we won't argue with that.
  32. Close doors – If you are not using a room, keep the door closed. This helps the heating and air conditioning unit to conserve energy. You can actually shut off vents in those rooms to help lower energy costs as well and then just open the vents when you plan to use the room.
  33. Cover leftovers – When you place uncovered liquids in your refrigerator, it causes vapors to be emitted that will add to the workload of the compressor, making your fridge use more energy. Plus those liquids tend to smell and taste like other foods in the fridge so it's best to keep everything covered.
  34. Use chest type freezers – Chest type freezers tend to use up to 30 percent less energy than upright models so if you are buying a new freezer, opt for a chest type.
  35. Take a shower – Showers use up to 50 percent less energy than tub baths. If you must have a soak, limit your baths to once each week and take showers otherwise.

We would love to hear other ideas for conserving energy and saving money. If you have an energy efficient idea, feel free to share with us.

How to Make Your Mascara Last Longer + Bonus Makeup Remover Recipe

How to Make Your Mascara Last Longer + Bonus Makeup Remover Recipe

Ok, so mascara is not cheap. Unfortunately, it often dries out long before it should leaving you to have to replace it. If you want to prolong the life of your mascara, there is an easy and effective way to do so and if you already have the ingredients at home, it is a really cheap way to prolong mascara life.

You need to just place about 5 drops of saline solution or eye drops into your mascara. That's it – you just use the want to mix the solution in and it will moisten your mascara and make it last a bit longer.

Please note that you should always throw mascara out if you have had an eye infection to keep the infection from spreading. If you simply notice that mascara dries up quickly however, this is a great remedy for that.

You can also save a bit by making your own eye makeup remover. You just have to mix:

  • 1 Tablespoon of tearless baby shampoo
  • 1 cup of water
  • ¼ teaspoon of mineral or baby oil

Use this to remove eye makeup. Another great and inexpensive eye makeup remover is Vaseline. You can use it to remove eye makeup at night and it helps to keep eye crusties from forming overnight.

Friday, December 30, 2016

Get Rid of Pesky Flies with This Neat Homemade Fly Catcher

Get Rid of Pesky Flies with This Neat Homemade Fly Catcher

Flies and summer seem to go hand-in-hand. You just can't have one without the other. Although there are many different sprays on the market to get rid of flies, not everyone wants chemicals sprayed around their homes. If you have small children or pets, these chemicals can be a bit dangerous. You could always invest in a few fly swatters but really, who wants to sit around all day swatting flies? There is a better way that is natural, easy and very effective.

For this natural and effective fly remedy, you just need:

  • An old mason jar or any jar that has a wide mouth
  • Sugar or syrup
  • A bit of water
  • A paper cone – you can make a cone by rolling up a piece of paper and taping it together

Just pour a bit of sugar water or syrup into the jar – just enough to cover the bottom.

Now cut a hole out of the pointed end of your paper cone. You want a hole that is large enough for a fly to get in. If you are rolling your own paper cone, just leave an opening about the size of a fly in the pointed end.

Slide the cone over the opening of the jar. Make sure that it covers the jar opening and then tape it in place.

Just leave this wherever you have flies, preferably somewhere that it won't get knocked over.

Flies are attracted to the sugar water or syrup and will instantly crawl into the jar where they get stuck. Watch the jar and when it gets relatively full of flies, just empty it and start over.

Save a Fortune by Learning How to Write Messages on Cakes

Save a Fortune by Learning How to Write Messages on Cakes

Decorating cakes is fun and really easy once you get the hang of it. Even if you are not ready to create stunning roses and other cake decorations, you can save a bit of money by learning how to write your own messages. Instead of having your cakes customized, you can just buy whatever cake you find that is decorated the way you want and write your own Happy Birthday or other message. The process is really easy and it may just inspire you to learn cake decorating in your spare time.

The steps are as follows:

  • Just trace whatever message you want to say on the cake with a toothpick
  • Once you are ready, trace over the outline with the icing that you are going to write the message in – there are many ready-to-use icings on the market that make it really easy to write in your message and they come with the writing tip already in place

That's it. If you want, you can practice a bit before you actually tackle the cake but writing is relatively easy, particularly once you have the message traced with a toothpick. You just have to follow your own outline and you have a customized cake that is easy and inexpensive.

(Image: Flickr member yorkd licensed under Creative Commons)

10 Ways to Lighten your Hair Naturally {Homemade Recipes}

1. Honey and Vinegar

Honey is a great lightening ingredient and the olive oil in this recipe will help to keep hair from drying out. To make it, you need:

  • 2 cups of distilled vinegar
  • 1 cup of raw uncooked honey – you can find this at most health food stores
  • 1 tablespoon of extra virgin olive oil
  • 1 tablespoon of ground cardamom or cinnamon – either one is good so it's really your choice

You just have to mix the ingredients together and then apply onto damp hair. You can use a brush or comb to make sure that you get it evenly distributed or just apply it wherever you want highlights. When you have the mixture applied, just wrap your hair in plastic wrap. If you have one, you can put a shower cap or swim cap on to keep the plastic wrap in place or just wrap a towel around your head.

You want to leave the mixture on overnight and then wash it out in the morning. There is no need to sit in the sunlight. This mixture works because honey has a small trace of hydrogen peroxide which is a lightening agent. Cinnamon and cardamom along with the extra virgin olive oil help to boost the lightening effect.

2. Tea

– Tea, specifically chamomile tea, is a great lightening agent. You can use black tea if you like but chamomile offers a number of properties that will help to keep your hair sleek and healthy. To use tea, you need:

  • 1 Tea Bag
  • Water

You simply boil the water and steep the tea bag for about 10 minutes. Once the tea has cooled, just rinse your hair with it and leave it on for about 15 minutes. You may want to do this 2 or 3 times before you shampoo or rinse to get extra lightening power.

3. Rhubarb

– Rhubarb works great and is a good choice during the summer. If you grow rhubarb, this one will not cost anything. If not, you can pick up rhubarb at your local grocery or farmer's market. To lighten hair with rhubarb, you will need:

  • ¼ cup chopped rhubarb
  • 2 cups water

Just bring the rhubarb to a boil and then allow it to cool completely. Strain and use the liquid as a rinse. Leave the rinse on for about 10 minutes and then just rinse clear with water.

4. Baking Soda

Baking soda is actually great for stripping your hair of chemical buildup and can be used as a lightening agent as well. This takes a while longer than other methods but if you use baking soda on your hair about once each week, you can strip harmful chemicals out and lighten your hair naturally over time.

5. Cinnamon

– Cinnamon is not only a great lightener but it smells great, too. Just take:

  • Cinnamon powder
  • Conditioner

You just have to add cinnamon powder to a small handful of conditioner and then evenly coat your hair from top to bottom. You may want to comb the mixture through to ensure that it coats evenly. Pull your hair up and keep it secure with a clip. You can use a shower cap to hold your hair in place and leave the mixture on overnight. Rinse and shampoo first thing in the morning. This mixture is perfectly safe for hair so you can use it more than once if you want to really see highlights.

4 Effective Home Remedies for Sore, Cracked and Stinky Feet

4 Effective Home Remedies for Sore, Cracked and Stinky Feet
Cracked heels and blackened feet
can happen to anyone. Normally, the shoes that you wear, particularly during the hot and dry summer months will cause your feet to dry out and could cause them to crack. There are a few products on the market to help heal dry feet but there are very effective home remedies that you can try as well.

One method uses shaving cream to help heal dryness. For this method you need to:

• Slather your feet with a generous amount of shaving cream.
• Mix together equal parts of Listerine and warm water.
• While you still have shaving cream on your feet, wrap a towel that is soaked in the Listerine mixture around your feet and allow it to sit for about half an hour.
• Using the same towel, rub the shaving cream off your feet. This will remove calloused and dry skin as well as the blackened or discolored skin that feet typically get when they are dry.
• Apply lotion to your feet for extra moisturizing.

4 Effective Home Remedies for Sore, Cracked and Stinky Feet

Another very effective method uses vegetable oil. You just have to rub vegetable oil on your cracked heels. You can use any type of oil so if you prefer coconut or olive oil, these work just as well. You may want to scrub with a pumice stone prior to using the oil and then just apply liberally all over your feet. If you do this at night, you can put on a pair of clean white socks and leave them on while sleeping. When you wake up, your feet will be much smoother. You can do this method several times each week if your feet are really dry.

Vaseline is another great remedy for cracked and blackened feet. Just apply it liberally all over your feet, put on a clean white pair of socks and go to sleep. If you are doing this during the day, just leave the white socks on until your feet soak it all in.
4 Effective Home Remedies for Sore, Cracked and Stinky Feet

A warm salt water bath is great for treating cracked heels as well. Just add some Epsom salts to warm water and soak for about 15 minutes. Afterwards, dry your feet very well and apply lotion. The warm salt water bath is great when used along with petroleum jelly. After you finish soaking, dry your feet and add the Vaseline and a clean pair of socks.

Thursday, December 29, 2016

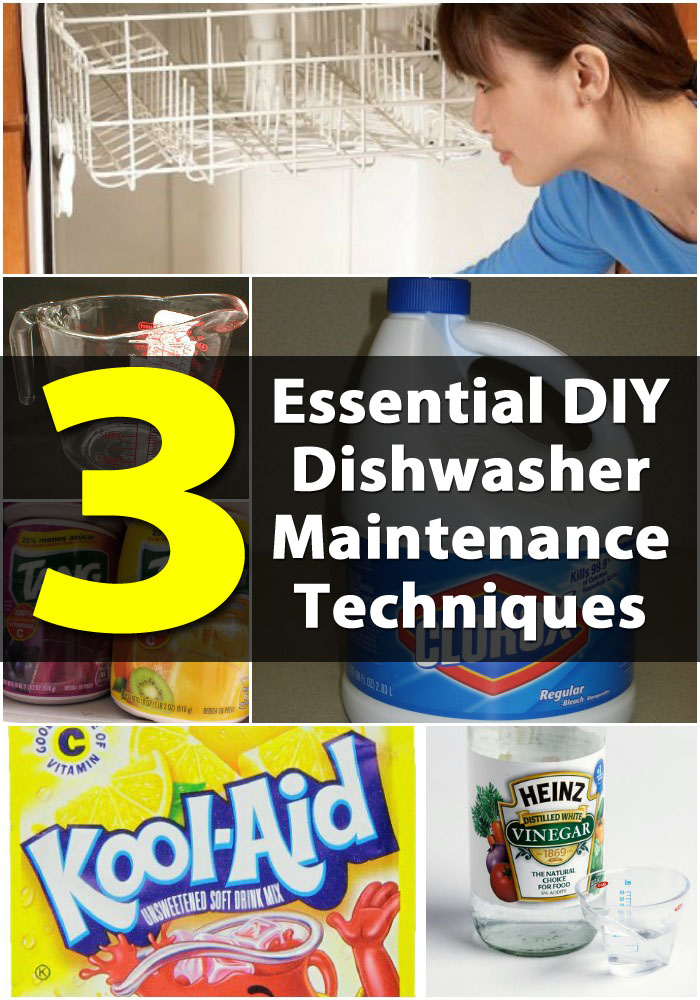
Top 3 Essential DIY Dishwasher Maintenance Techniques

Dishwashers help you to save time by automatically cleaning dishes instead of forcing you to wash them the old-fashioned way. When your dishwasher fails to work properly however, it can often be cause for concern. If you notice that your dishes are not as clean as they should be, there could be a few reasons why.

Top 3 Essential DIY Dishwasher Maintenance Techniques

You can maintain your own dishwasher and save yourself a few bucks on a service call if you know what to look for when it fails to work properly. While you may not always be able to take care of the problem yourself, there are many things that you can do to get that dishwasher back in tip-top shape and ensure that your dishes are coming out sparkling clean.

We have collected the best maintenance and cleaning techniques that are easy to do and will help to keep your dishwasher clean and problem free. Use the article navigation buttons below to navigate

Dishwasher Not Cleaning Dishes
When your dishes aren't getting clean, there could be a couple of things causing the problem. If the unit is running properly but your dishes are still coming out dirty, you may have a water flow problem and there are a couple of ways that you can solve this issue.

First, take a look at the spray arm. Removing the arm and cleaning out the holes inside could instantly give you better cleaning power. Keep in mind that while some spray arms simply snap off, others have screws holding them on so be sure that you do not break anything when you remove the arm.

The inlet screen could also be clogged. If this is the case, you may need to clean or replace the screen and/or valve. You just have to disconnect and remove the water line and then take out the valve to replace it. Detailed instructions at Familyhandyman – Dishwasher Repair Tips: Dishwasher Not Cleaning Dishes

Clean your dishwasher
Dishwashers tend to accumulate dirt buildup over time. In order to keep it running properly and to ensure that your dishes come out clean, you have to actually clean your dishwasher from time to time. You can begin by simply pulling out the lower rack and checking to see that nothing is clogging up the drain.

Vinegar or even lemon Kool-Aid – non sweetened of course, are great for cleaning and both will eliminate dirt and debris. If you really need to sanitize, you can add bleach or baking soda to give it a really deep clean. Keeping the inside of the dishwasher clean and food-free is essential in ensuring that your dishes always come out sparkling.

Bleach is great for eliminating mold and mildew, although you should avoid using bleach on dishwashers that are stainless steel on the inside. Detailed instructions at One Good Thing by Jilee – How To Clean Your Dishwasher {Best Of Jillee}

Clean your dishwasher with Tang
Hard water can be really hard on your dishwasher and cause quite the buildup over time. Tang, the orange breakfast drink, is actually an excellent cleaner to get rid of that buildup. You just have to put it in your dishwasher about once each month and it will help you to prevent hard water deposits.

Imagine something so yummy being so great for cleaning the dishwasher and it's relatively inexpensive, especially when you compare the price of Tang to the cost of having your dishwasher professionally serviced. Detailed Instructions at One Creative MommyHow to Clean Your Dishwasher with Tang

The 2 Most Powerful Oily Skin Treatments – Homemade Egg White Mask and Pore Cleansing Technique

The 2 Most Powerful Oily Skin Treatments - Homemade Egg White Mask and Pore Cleansing Technique

Oily skin is very common and sometimes easy to eliminate. Unfortunately, some have more problems with it than others. If you are prone to oily skin, you know that shine that comes up when you least expect it, there are things that you can do without having to spend a fortune at the beauty counter. There is a very effective DIY beauty mask that uses egg whites and lemon juice that takes very little time to apply and will take away that excess oil.

Egg whites are great for fighting oily skin because they shrink pores and help to tighten skin. This egg white mask is easy to make and takes only 2 ingredients:

1 large egg – you will need to separate the white from the yolk

3 to 4 drops of lemon juice – fresh juice is recommended

To begin, just separate your egg and place the white in a bowl. Add the fresh lemon juice and use a wire whisk to gently blend the two ingredients. After you have washed and dried your face, rinse with warm water and then just apply the mask to your face by dipping your fingers into the mixture and gently rubbing it all over in an upward circular motion.

The mask needs to dry for at least 15 minutes. You will know when it is finished because it will become a bit hard and completely dry. Just rinse with warm water and then use a moisturizer that is designed for oily skin.

The Most Powerful Oily Skin Treatment - Homemade Egg White Mask

Another great oily skin treatment is to simply add a few drops of lemon juice into a bowl filled with boiling water. Just hold your face over the bowl so that the steam can open your pores. You can place a towel over your head so that none of the steam escapes. Hold your head over the steam for as long as you can or until the steam dissipates and then simply wash your face with face wash designed to treat oily skin and rinse with warm water followed by cold water to close up your pores.

Homemade Cleaner to Make Stainless Steel Sinks Really Shine

Homemade Cleaner to Make Stainless Steel Sinks Really Shine

Whether you are cleaning stainless steel sinks or you have any other type of sink material, there is a great homemade recipe that will help you to remove dirt and grime and get a wonderful shine. To clean those sinks and make them look sparkling new again, you will need:

  1. Vinegar
  2. Baking soda
  3. Some boiling water
  4. Goo Gone
  5. Olive oil
  6. Cleaning sponges, paper towels and/or rags

To begin, just spray your sinks down generously with plain white vinegar. With the vinegar still in the sink, sprinkle it with baking soda. Allow this to set for at least 10 minutes – you can leave it longer if you have a really dingy sink. While it's setting, boil a pan full of water. Once the water is boiling, rinse the sink with it. Next, spray your sink again with vinegar and scrub away any residue. Rinse and spray with Goo Gone. Now just wipe clean. You can put a generous dollop of olive oil on a paper towel or rag and then use that to buff and shine your stainless steel to make it look like new.

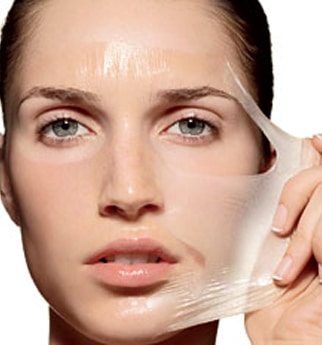
Amazing Miracle Mask You Can Make at Home

Amazing Miracle Mask You Can Make at Home

If your skin is stressed out, you will begin to notice that it looks tired and maybe even a bit red and puffy. A great way to relax stressed skin and give it a healthier glow is to use a mask that is designed to release stress and reduce swelling. Photo shows Ceara applying the mask! Check out her blog it’s awesome.

There is a great DIY miracle mask that takes just a few ingredients and is easy to make.


You just need:

  • 2 tablespoons of honey
  • 1 teaspoon of ground cinnamon
  • 1 teaspoon of ground nutmeg

Sounds almost like a great holiday recipe, huh? The honey and nutmeg both have anti-inflammatory properties which will reduce redness and swelling and can help to sooth scars from acne. They also help to prevent infection. Cinnamon and nutmeg work together to exfoliate your skin so that it will be smooth and glowing.

Make sure before you use the mask that you are not allergic to any of the ingredients. You can do a patch test to ensure that you have no adverse reactions. To make the mask, just mix the ingredients together until they form a thick paste. Apply the paste to your face using a circular upward motion and allow it to set for at least 30 minutes. Wash your face with warm water and gently scrub in a circular motion while doing so to get the exfoliating effects. Follow up with a moisturizer or whatever you typically use after your beauty masks.

Wednesday, December 28, 2016

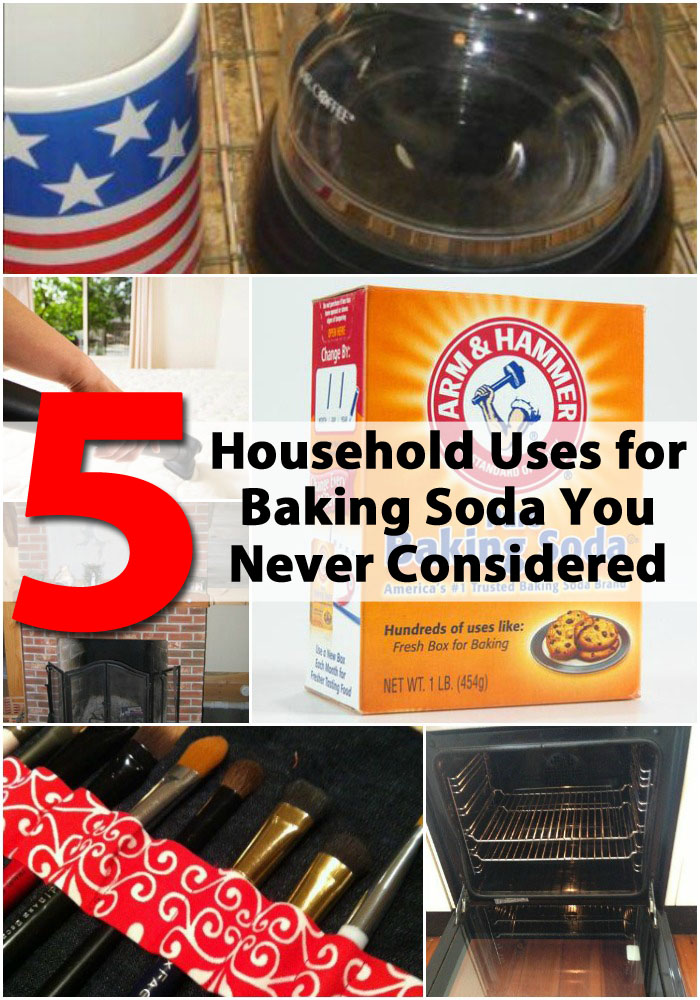
5 Household Uses for Baking Soda You Never Considered

Baking soda is cheap and really effective at many different things. Some people use it to keep bugs away, others prefer it for its scrubbing abilities and still others have a box in the fridge to keep odors at bay.

5 Household Uses for Baking Soda You Never Considered

Whatever uses you had for baking soda in the past, we bet we have found a few that you have never even considered. Most people know that you can put baking soda in the vacuum to help freshen carpets and keep smells away. You may already use it in your cat's litter box to fight odors or perhaps you just cook with it as it was originally intended.

For less than $1, a box of baking soda can actually do so much more than just help you in the kitchen. You can use it throughout the house and garage for many purposes and when compared to the cost of traditional cleaners and deodorizers, it simply makes sense to grab a box of baking soda the next time you shop.

Freshen Mattresses

Freshen Mattresses - 5 Household Uses for Baking Soda You Never Considered

You can mix a bit of baking soda with your favorite fabric softener and sprinkle this mixture over your mattress to freshen the bedroom just a bit. Every other month or so, do this and let it set for about an hour. Vacuum it away and it will take odors as well as dust mites with it. You can simply keep the mixture in a mason jar or another sprinkle jar to have it readily on hand.

You may even want to store the jar in your closet or dresser to help keep your clothes smelling fresh all the time. Fabric softeners alone are great but the scent wears off after a while in the closet. This mixture ensures that your clothes always smell their best and it removes those nasty dust mites from the mattress that can cause allergies and other problems.

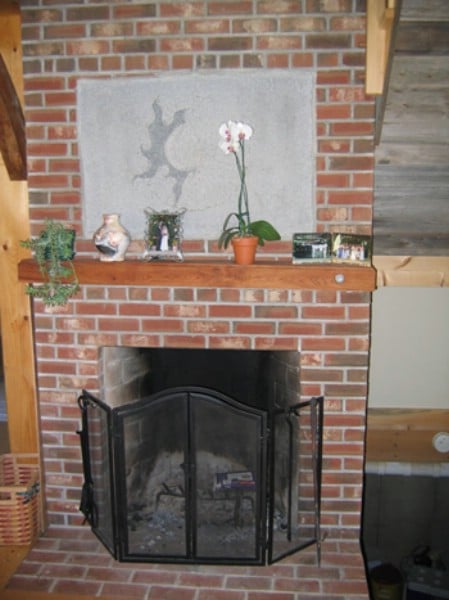
Clean Your Fireplace

Clean Your Fireplace - 5 Household Uses for Baking Soda You Never Considered

Yep, you can even clean your fireplace with baking soda. Whether you are just buying a home with an old fireplace or yours needs a good deep cleaning, a mixture of baking soda and water will do wonders. You just have to make a thick paste of baking soda with just enough water to mix.

Apply the paste to the fireplace and use a scrub brush to scour away old stains and odors. The fireplace is a good place for odors to hang around and nobody wants the smell of dirty soot in their homes. This easy and cheap cleaning solution will take away those black stains as well as that sooty odor and leave your entire room looking and smelling great.

This is perfectly safe for brick fireplaces and baking soda can even remove black stains from coals that you may have on your carpet from accidents with the fireplace. Photo Oldschoolbuilders.

Clean Makeup Brushes

Clean Makeup Brushes - 5 Household Uses for Baking Soda You Never Considered

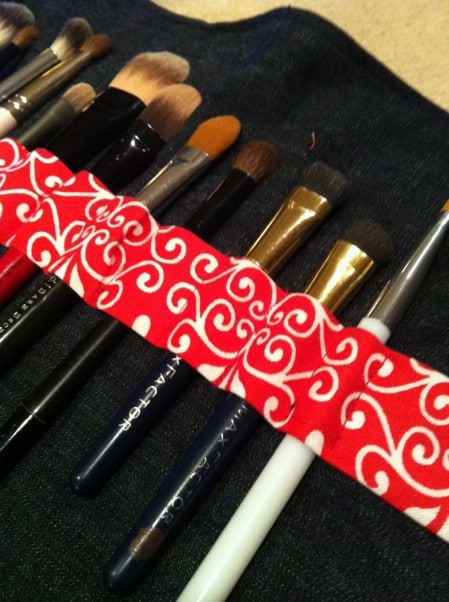
You can easily clean makeup brushes, hairbrushes, combs and practically anything else in your bathroom with just a couple of tablespoons of baking soda and some warm water. To clean brushes, just add the baking soda and water together in a small bowl. Add brushes one at a time and swoosh them around in the water so that the baking soda can do its job.
This is a great way to keep your makeup brushes fresh and clean and lasting longer. Instead of throwing them out when they become gunked up with makeup, just use a little baking soda and clean them up. This is also a great recipe for cleaning hairbrushes and combs. The baking soda will remove hairspray and other chemicals that may build up on your brushes and combs and leave them sparkling clean which is much better for your hair. Do this about once a month to keep all of your brushes in good shape. Photo: Txrockstarlibrarian.

Clean Your Automatic Coffee Maker

Clean Your Automatic Coffee Maker - 5 Household Uses for Baking Soda You Never Considered

There is absolutely nothing worse than a cup of coffee from a dirty coffee maker. Need to clean your coffee pot? Baking soda works great. You need ¼ cup of baking soda and about a cup of warm water. Just pour this solution into your coffee maker like you were making a pot of coffee. Incidentally if you use a basket filter, this cleans it as well.
Once the cycle has completed, run 2 or 3 cycles of clean water before you make another pot of coffee. You can do this about once each week to keep your coffee maker good and clean. This not only cleans the inside of your coffee maker, baking soda is great for getting dried and burnt coffee off the inside of your coffee pot or carafe. You can add a little baking soda and just a small handful of crushed ice and swirl it around until the stains come out. Make sure that your glass pot is cooled off before adding the ice. Photo by Hadice.

Clean Your Oven

Clean Your Oven

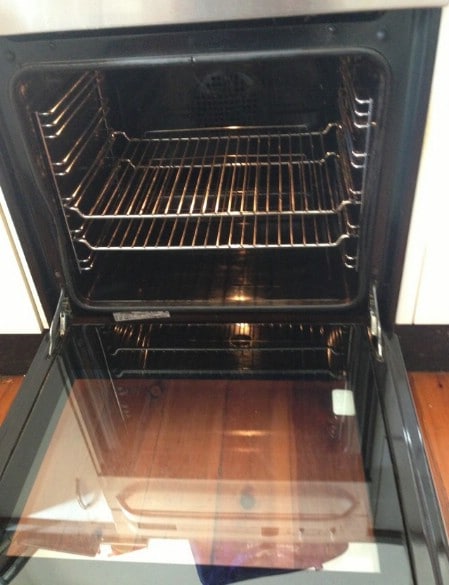
Okay, so you may already know that baking soda is a great oven cleaner but do you know how easy it makes cleaning that oven? You just have to spray your oven down with a little warm water, just enough to dampen the sides, top and bottom. Once you have it sprayed, just add a good thick layer of baking soda. You want the water and baking soda to work together to create a paste so if you notice any dry baking soda, spray it down just a bit.
Leave this solution on your oven for at least a couple of hours, and leave the oven off. After a couple of hours, you can return and wipe the baking soda solution away with a damp cloth. All of the dirt and grime from the oven should come off. If you have a lot of buildup, you may want to do this a couple of times to get it all but for most, one application should be plenty. Photo Ovenperfect.

Top 8 Most Popular Ways to Preserve Tomatoes for Winter

Canning Tomatoes the Old-Fashioned Way

Canning Tomatoes the Old-Fashioned Way - Top 8 Most Popular Ways to Preserve Tomatoes for Winter

Canning can be very fun and very rewarding. Because tomatoes contain natural acids, they don't have to be pressured canned. Instead, you can use a water bath canner which is much easier. You just have to be sure that you prep your tomatoes and your jars and lids before you begin.
Once you have the tomatoes and jars ready, you just need to add a little lemon juice and a pinch of salt to the jars before you add the tomatoes. Pour boiling water over the tomatoes and place the lids on. Be sure that you leave enough room at the top for sealing. Boil your tomatoes in a water bath canner for about 40 minutes for pints and 45 minutes for quarts.
When your time is up, just remove the jars and ensure that all of them sealed correctly. Just push on the center of the lid. If it is properly sealed, it won't budge. You can store your home canned tomatoes in a dark area for up to one year so you can enjoy them until it's time to can again next year.
Techniques and recipes – Momprepares

Freezing Tomatoes for Future Use

Freezing Tomatoes for Future Use - Top 8 Most Popular Ways to Preserve Tomatoes for Winter
If you don't have a canner or you prefer to freeze your foods, you can easily freeze tomatoes. You can skin the tomatoes before you freeze them by simply dropping them into a pan of boiling water. Cut a small slot in the bottom of each before boiling them. You will notice that the skins begin to split once the water starts to boil. When this happens, just remove them from the boiling water and drop them in cold water to stop them from cooking any further. The skins will simply slide off.
Once you have the skins removed, you can cut the tops off and remove the seeds if you want. If you are working with larger tomatoes, you may want to cut them into quarters. This is entirely up to you. You can simply cut them up and add to freezer bags or if you want stewed tomatoes, you can just cook them in boiling water for about 15 minutes. Cool them thoroughly before adding to your freezer bags. As you add the tomatoes, be sure that you squeeze out as much air as possible so that they taste better when you use them in the future.
Techniques and recipes – Deepsouthdish and Makeithomemade

Freezing Cherry Tomatoes

Freezing Cherry Tomatoes - Top 8 Most Popular Ways to Preserve Tomatoes for Winter
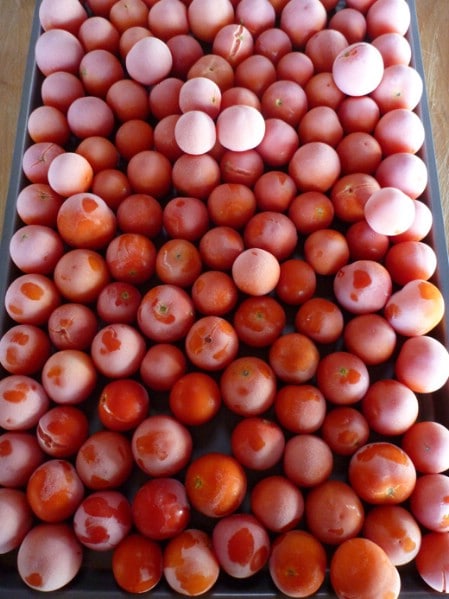
Cherry tomatoes are so small that it really makes little sense to peel them. Instead, you can simply freeze them whole just as they are. This is a really fast process that does not require blanching and freezing them whole helps to retain the nutrients that are found in the skins.
To freeze cherry tomatoes – or other smaller types of tomatoes- just wash and dry them thoroughly and lay them out on a cookie sheet. Place the entire cookie sheet filled with tomatoes into your freezer for just a couple of hours until the tomatoes are frozen solid. Laying them out like this eliminates the risk of them freezing together into clumps. When they are frozen through, just add them to a gallon sized freezer bag or other freezer container and you are finished. You can freeze tomatoes for up to a year at a time and enjoy them anytime you want.
Techniques and Recipes – Gardenbetty

Make Tomato Paste

Make Tomato Paste - Top 8 Most Popular Ways to Preserve Tomatoes for Winter
Tomato paste is a kitchen essential for many dishes and although it is not terribly expensive in stores, there is nothing better than your own homemade tomato paste when preparing tasty foods in the kitchen. Tomato paste is also very easy to make and can be frozen for up to six months or so before the taste begins to change.
To make your own tomato paste, just peel tomatoes and remove the seeds. Chop into relatively small pieces so that they will break down easier. If you want a rich tomato flavor, you can actually leave the seeds and peelings intact although you will need to strain them through a sieve before you freeze or can. Cook the tomatoes over medium to low heat and add a half a teaspoon of salt for every 5 or so tomatoes that you are going to cook.
You just have to continue cooking until you get a pasty consistency. Once you see this, you can cool the tomatoes and add them to ice cube trays for freezing. Once they are frozen, simply remove from the trays and store in a freezer bag.
Techniques and Recipes – Thekitchn

Top 10 Most Creative Household Uses for Borax

1 Keep Pests Away

Keep Pests away using Borax - Top 10 Most Creative Household Uses for Borax
Borax is very effective at keeping cockroaches, ants, water bugs and a few other household pests at bay. You just have to mix equal parts of borax with regular sugar. The sugar helps to draw the bugs in and the borax takes them away – permanently. Take care that you do not leave this out where pets or small children can reach it. Mule Team Borax actually recommends that you keep it away from your pets so keep the bug treatment somewhere that pets cannot reach.

Good places are under stoves, refrigerators or sinks. These are areas that are normally infested the most anyway so they are good places to begin treating your home for pests. Borax also works well on mice. You just have to sprinkle it in areas where you think mice may be hiding and it will work wonders to get rid of those bothersome pests. You can also sprinkle it on carpet and vacuum to remove fleas or sprinkle on your mattress to rid your bed of bed bugs.

2. Get Rid of Rust

Get Rid of Rust - Top 10 Most Creative Household Uses for Borax

Mixing 1 cup of Borax with 2 cups of warm water and 1 tablespoon of lemon juice works wonders on rust. If you have old pots and pans that are rusted, you can add this solution, which should be like a paste, and let them sit for about 15 minutes. Rinse and then just scrub the rust away.

This works well on things other than dishes, too. You can use it to remove rust from appliances and virtually anything metal. Imagine the work that you can do to old patio furniture. Just remove the rust and paint. If you find that the rust is a bit stubborn, leave a second coating on to sit for another 15 to 20 minutes and it should lift right off with a scrubbing sponge.

3. Make an All-Purpose Cleaner

Make an All-Purpose Cleaner - Top 10 Most Creative Household Uses for Borax

Mixing just 2 tablespoons of Borax with 2 cups of hot water makes a wonderful all-purpose cleaner. Just mix the solution together in a spray bottle and use it to clean kitchens and bathrooms or just anywhere you need a little extra boost for your cleaning. This is a very inexpensive cleaner, when compared to other all-purpose cleaners on the market, and the Borax is great for getting really stubborn stains off.

You can use it to remove crayon and pencil marks from your walls – test a spot first to make sure that the paint doesn't come off. It makes a great degreaser for stoves and countertops and your bathtub will really sparkle when you clean it with Borax.

4. Make a Floor Cleaner

Make a Floor Cleaner - Top 10 Most Creative Household Uses for Borax

1 teaspoon of dish detergent mixed with 1/3 cup of Borax, 1 tablespoon of ammonia and a gallon of hot water makes a wonderful floor cleaner. The Borax will help to get stubborn stains from the floor and you can use it on tile, linoleum or hardwood flooring.

Scuff marks from the kids' shoes will come up easily due to the scrubbing power of Borax. Note that if you are not really a fan of ammonia, you can use lemon juice instead if you want. It gives a much better aroma and still helps you to get your floors sparkling clean. Just spray on your floors or add to your mop bucket and mop away. The mixture of cleaners along with the cleaning power of Borax will remove virtually any stain from your floors, even if they've been there for a while.

5. Make Your Own Liquid Plumber

Make Your Own Liquid Plumber - Top 10 Most Creative Household Uses for Borax
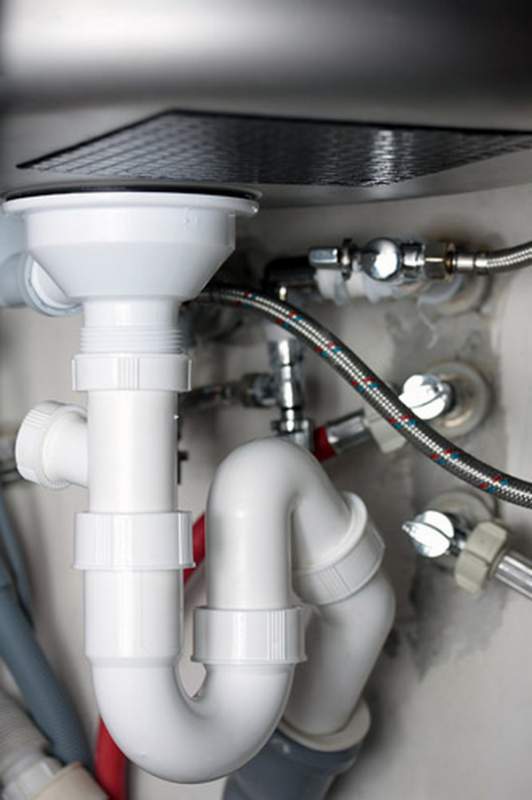
Just ½ cup of Borax poured down your drain will unclog it when you follow with a couple of cups of boiling water. Add the Borax followed by the boiling water and leave for at least 15 minutes. Then just run your tap water until it is all flushed out.

The Borax helps to break down gunk and stuff that gets stuck in your drain and the boiling water helps to flush it all away. Not only will this remove that gunk and unclog your sink drain, it will also clean and disinfect it so it will smell much better when you are finished.

Who says you have to pay a fortune for drain treatments? Borax is much cheaper and works just as well as the best drain cleaners on the market. You can also add it to your garbage disposal to clean and disinfect it and to keep it from clogging.

The Ultimate Car Preparedness Checklist – Emergency, Security, Sustenance and Entertainment Essentials

Emergency Essentials

Some emergencies can be avoided if you have the right supplies with you. Ensuring that you are prepared for inclement weather for instance, is critical when you are driving. For those unforeseen emergencies, always ensure that you carry the following items with you at all times.

  1. An emergency cell phone charger – You can purchase an emergency cell phone charger that will give you at least an hour of power should your cell phone battery go dead during an emergency.
  2. Cat Litter – Cat litter is essential during snow and ice. If you get stuck, you can simply pour the litter behind tires to give yourself enough traction to get unstuck.
  3. Jumper cables – This goes without saying. You always need to ensure that you have jumper cables in your vehicle.
  4. First-Aid Kit – A first-aid kit should include Band-Aids as well as antiseptic, adhesive tape and gauze, pain relievers and some sort of antiseptic ointment.
  5. Fix-A-Flat – Fix-A-Flat is essential for those times when your tire may go flat and you are in the middle of nowhere. It can give you enough air in the tires to get your vehicle to a safe location.
  6. Flashlight – Flashlights are an important part of any vehicle emergency kit for obvious reasons.
  7. Tow Straps – You want to be certain that you have a tow strap available just in case you slide off the road and need something that can pull you back out. Tow straps should be strong enough to pull at least 6,000 pounds.
  8. Snow shovel – Even a small portable shovel can come in handy when you are stuck in snow or mud.
  9. Ice Scraper – Never, ever leave home during the winter months without an ice scraper so that you can easily eliminate ice on your windshield before driving.
  10. Blanket – You should always store a blanket in the trunk, particularly during colder weather. In the event you get stalled or stopped along the roadside during cold weather, the blanket will help to prevent heat loss from your body.
  11. Multipurpose Knife – A Swiss army knife or similar multipurpose tool will come in handy for many things if and when you are ever stuck in your vehicle.
  12. Extra Batteries – You want to be sure to have at least a full change of batteries for all of your emergency essentials that use batteries.
  13. Gloves – Gloves will help to prevent frostbite during the rigid winter months and can come in handy for mechanic work when needed.
  14. Waterproof Matches – In the event you are stranded and need to start a fire (outside the vehicle of course) to stay warm, you need to have at least one package of waterproof matches or some other fire starter.
  15. Light Sticks – Light sticks or flares are essential in drawing attention to your vehicle if you are stranded along a deserted road.
  16. Sunblock and Bug Repellent – For summer months, sunblock and bug repellent is essential for any time that you need to be outside of the vehicle.
  17. Maps – Before you embark on any road trip, be sure that you have at least one map that shows where you are going and how to get there, even if you know the directions by heart.
  18. Collapsible Bags – Nylon bags that collapse can easily be stored in the trunk and when something happens that you have to leave your vehicle, in flooding scenarios for instance when you have to head to higher ground, you can carry several essentials with you easier when you have a bag to tote them in.

Tuesday, December 27, 2016

32 Brilliant Homemade Cleaning Recipes for a Frugal Household

Homemade Kitchen Cleaners

There are many cleaning needs in the kitchen from stoves and countertops to dishes and we have a recipe for a homemade cleaning product to suit every kitchen cleaning need.

Homemade Oven Cleaner
A great way to keep your oven clean without the use of chemical based oven cleaners is to simply sprinkle a little baking soda inside when you have a spill. For general cleaning, you can just dampen the sides and bottom and sprinkle baking soda. Leave it there for about an hour and then just wash it away with a clean damp rag. To prevent your oven from needing to be cleaned regularly, just dip a sponge in vinegar and wipe the sides and bottom down about once a week.

Heavy Duty Oven Cleaner
For those really tough oven stains and spills, just mix a cup of vinegar with ¼ cup of powdered laundry soap until it makes a paste. Heat the oven for at least 5 minutes at 350 and then turn it off. Spread the paste evenly adding a bit more for really greasy places and leave there for an hour. You can use a plastic spatula to scrape the paste off and the grime will come with it.

Kitchen Counter Cleaner
To easily clean kitchen counters, just mix about a cup of liquid dish soap with ¼ cup of vinegar in a spray bottle. Spray stains and wipe clean with a damp rag. For really tough stains, you can leave the solution on the counter for about 15 minutes and then just wipe the stain away. Vinegar is also a great disinfectant, so this cleans and gets rid of germs.

Homemade Drain-O
You don't have to use chemicals to unclog your sinks. If you have a lot of water standing in the sink, bail as much out as you can. Then just pour 1 cup of baking soda directly down the drain followed by 1 cup of vinegar. You should see it bubble up as soon as the vinegar goes in. Use a plunger to dislodge any large clogs and the vinegar and baking soda will do the rest. To keep sinks from clogging, pour boiling water directly down the drain about once each week.

Stovetop Cleaner
Stovetops tend to get greasy and grimy after cooking and to easily clean them, you just have to sprinkle a bit of baking soda over the stove and then wipe the grease and grime away with a damp rag. Make sure that you squeeze the excess water from your rag so that it doesn't dilute the baking soda too much.

Glass Stovetop Cleaner
Glass stovetops are popular but boy are they hard to keep clean! You can easily clean up stains from those glass tops with just a little baking soda and a damp rag. For everyday cleaning, just wipe the stovetop down with vinegar each night when you clean the kitchen. The vinegar will clean up most stains and will give your glass tops a great shine.

Dishwasher Detergent
You can make your own automatic dishwasher detergent with just 1 cup of borax, 1 cup of washing soda (you can find these at most grocery stores) and a little vinegar. Just mix the dry ingredients together and use 1 tablespoon for large loads and ½ tablespoon for small loads. Add the vinegar as a rinsing agent to keep spots from your glasses.

Hand Dishwashing Soap
If you don't have a dishwasher or you simply prefer to wash dishes by hand on occasion, you can make your own dish soap with a bar of ivory soap and a little water. You will want to grate the flakes and add to a large pot with ½ gallon of water. Boil for 10 minutes to dissolve the flakes and then pour into a glass jar to cool. Just add about a tablespoon or however much you want to your sinks for washing dishes.

Homemade Kitchen Soft Scrub
Mixing baking soda and a little liquid soap together into a paste makes a wonderful cleaning product that works just like Soft Scrub. You just have to add baking soda to the liquid soap until it makes a relatively thick paste. Be sure that you only mix when you are ready to clean. This one dries up pretty fast so mix it only when you need it.

Rust Remover
If you have rust on your countertops or stove, or food stains for that matter, you can just cut a lemon in half and squeeze the juice on the area. Leave the fresh juice on the stain for about half an hour and then just wipe away with a damp cloth. This is a great natural cleaner and it smells good, too. If you have hard water stains, salt and vinegar work wonders. Just mix ¼ cup of salt and 2 tablespoons of vinegar to remove rust, hard water and other stains.

Kitchen Sponge Saver
If you tend to go through a lot of kitchen sponges, you can revitalize them and make them last longer by just squirting dish soap into a sink full of hot water and soaking them for an hour or so. You can also place damp sponges in the microwave for about 1 minute to sanitize and dry them out so that they last a bit longer.

11 DIY Wall Quote Accent Inspirations That Will Beautify Your Home

11 DIY Wall Quote Accent Inspirations That Will Beautify Your Home
Art for walls does not necessarily have to be in the form of paintings. There is no written rule in the home décor book that says you can't have heartwarming and inspirational quotes on your walls. In fact, if you are looking to customize your wall art, wall quote decals are the perfect way to do so. We have a nice post on how to DIY Wall Stencils and Decals if you decide to do them yourself.

Wall quotes are fun and trendy and give you the opportunity to say what you want to say so that everyone who enters your home will see your personal message of inspiration. There are a number of vinyl wall quote accents on the market that are very easy to use and look like they have been hand painted. The difference is that they take much less time to apply and do not cause a mess like painting does. You can choose different sayings for different rooms and add a touch of personalization all over your home.

You Are Blessed

What better way to spread a bit of hope and inspiration than by reminding people that they are truly blessed? This is a beautiful saying and these decals come in different color choices. This is a great piece for the living room wall or would make wonderful nursery décor. Add a few favorite photos around the saying and you can really dress up your walls.
No thanks I’ll just buy them – Leenthegraphicsqueen11 DIY Wall Quote Accent Inspirations That Will Beautify Your Home - You Are Blessed

Home and Family Inspiration

If you want to show everyone that you are truly blessed by your home and family, these decals are a great way to do that. There are a number of choices and they are relatively inexpensive so you can choose more than one and still decorate your walls pretty cheaply.
No thanks I’ll just buy them – Aliexpress11 DIY Wall Quote Accent Inspirations That Will Beautify Your Home - Home and Family Inspiration

To The Moon and Back

If you are decorating a nursery, the "I love you to the moon and back" decal is a great choice. It comes in different colors, even pink for little girls, and is a beautiful saying for any wall. The hearts, stars and moon shapes make it perfect for babies and toddler's rooms and the decals are very easy to apply.
No thanks I’ll just buy them – Artgaga11 DIY Wall Quote Accent Inspirations That Will Beautify Your Home - To The Moon and Back

First We Had Each Other

This is a beautiful saying for any nursery. It speaks of the love between a couple and how their love is complete now that baby has arrived. The decals come in a number of color choices so they are really easy to match up to any existing décor and there are 2 size choices that make it perfect for smaller rooms.
No thanks I’ll just buy them – eBay11 DIY Wall Quote Accent Inspirations That Will Beautify Your Home - First We Had Each Other

Family Wall Art

Family sayings are very heartwarming. They are perfect for decorating dining rooms or living rooms and you can surround them with pictures of family members to make the entire wall look like a dedication to the family that you love. Vinyl decals are also easy to remove so you can move them from room to room if you want without worries of stripping paint from the walls.
No thanks I’ll just buy them – Amazon11 DIY Wall Quote Accent Inspirations That Will Beautify Your Home - Family Wall Art

Kiss Me Goodnight

The "kiss me" sayings are perfect for the master bedroom. These make wonderful wedding gifts and any newly married couple will love decorating their new home with them. They look great above the bed or just anywhere on the wall. "Always Kiss Me Goodnight" goes right along with the "never go to bed angry" lesson that all married couples have been taught.
No thanks I’ll just buy them – Amazon11 DIY Wall Quote Accent Inspirations That Will Beautify Your Home - Kiss Me Goodnight

Dance In The Rain

What a beautiful saying – Dance in the Rain is a very inspirational message that you will be proud to have on your wall. After all, life really isn't about the storm. It is about learning how to dance in the rain. This beautifully inspirational saying is perfect for any home, particularly those that have gone through hard times and come out ahead.
No thanks I’ll just buy them – Amazon11 DIY Wall Quote Accent Inspirations That Will Beautify Your Home - Dance In The Rain

Family Rules

You can find family rules signs that hang on the wall but what better way to show your love and support for each other than to have it written on the wall itself? This family rules decal is something that your children can come to love through the years. They will be reminded of their wonderful childhood each time they see the saying on your wall.
No thanks I’ll just buy them – Amazon11 DIY Wall Quote Accent Inspirations That Will Beautify Your Home - Family Rules

Be Silly

Be Silly, Be Honest, Be Kind – This is the perfect wall quote for any teenager's room. The lettering is perfect for younger children as well. Big bold letters deliver this wonderful message that is sure to spark a smile in your child each morning when he wakes up and sees his inspirational message.
No thanks I’ll just buy them – Amazon11 DIY Wall Quote Accent Inspirations That Will Beautify Your Home - Be Silly

BeYOUtiful

What a great saying for a bathroom or bedroom wall! Being yourself is important and this saying will remind you or anyone in your home to always be yourself. This inspiration can greet you in the bathroom mirror every morning and brighten your day before it even begins. It is also a great choice for teenage girls' rooms.
No thanks I’ll just buy them – Amazon11 DIY Wall Quote Accent Inspirations That Will Beautify Your Home - BeYOUtiful

Sweet Dreams

This is the perfect wall quote for every bedroom in your home. Whether you are decorating your master bedroom, kids' rooms or nursery, telling them to have Sweet Dreams every night is a lovely sentiment. The saying is perfect for baby's rooms and will look great surrounded by your family photos.
No thanks I’ll just buy them – Amazon11 DIY Wall Quote Accent Inspirations That Will Beautify Your Home - Sweet Dreams

Whether you are looking for quotes for a kid's room, teenager's room or you want something in your main living area to inspire guests, there are many options that you can choose. Wall art decals are inexpensive and so easy to use that you may find yourself adding one to every room in your home. Décor quotes are a trend that is growing quickly and we have compiled a collection of beautiful and heartwarming sayings that you can choose to inspire those who live in and visit your home.

8 Delicious and Vitamin Rich Winter Fruit Salads

Just because winter is coming does not mean that you have to give up delicious salads. Although summer salads are popular because their ingredients are typically in season during the warmer months, there is no reason at all why you shouldn't enjoy a good salad during the colder months.
8 Delicious and Vitamin Rich Winter Fruit Salads

Winter fruit salads are chocked full of delicious fruits that are healthy and will certainly help to drive away those winter blues. Whether you prefer the tangy zest of citrus or you like salad ingredients that are a bit more traditional, we have just the collection of vitamin filled winter fruit salads for you.

These fruit salads are easy to make, use ingredients that you can readily find during the winter months and are heavenly. Use them for a quick and healthy lunch or just anytime you want something wholesome and nutritious to eat. We bet there is at least one in the collection that will become your favorite go-to salad during cold weather.

Citrus and Pomegranate Salad

Citrus is delicious and easy to find during winter months. Adding oranges and grapefruits to pomegranate seeds makes a great tasting salad that is very low in calories and absolutely delicious. The salad only has three ingredients although you could substitute tangerines for the oranges if you like. Pomegranates are filled with healthy antioxidants and loads of vitamin C so this is the perfect salad to help you ward off those winter sniffles.
Recipe and Instructions – Onceuponachef
Citrus and Pomegranate Salad

Winter Fruit Salad

A fruit salad filled with pomegranate seeds, oranges, pineapple, kiwi and grapefruit will be filled with vitamins and nutrients that will help you to avoid colds and flus this winter. This delicious salad offers loads of Vitamin C and pomegranate which is full of antioxidants. You should be able to find kiwi at your local grocery store and grapefruits and oranges are always easy to find during winter.
Recipe and Instructions – Myrecipes
Winter Fruit Salad

Mandarin Orange and Cranberry Salad

Cranberries and winter seem to go hand in hand and a salad made with cranberries, pineapple chunks, mandarin oranges and mint will be the perfect salad to fight off those winter blues. Who can possibly feel moody when they have such a delicious fruit salad to enjoy? You can also add kiwi and star fruit if you want to really make this salad extra special.
Recipe and Instructions – Vegetariantimes
Mandarin Orange and Cranberry Salad

Fruit Salad with Poppy Seed Dressing

Poppy seeds mixed with lemon have a wonderful flavor and you can create a delicious fruit salad with a dressing made from lemon juice and poppy seeds. Bananas, pomegranate and clementine oranges make up a yummy fruit salad and when you top it with a light dressing, it is a very healthy and delicious dessert. The pomegranate and citrus in this salad offer loads of vitamin C for curing winter colds.
Recipe and Instructions – Wholelifestylenutrition
Fruit Salad with Poppy Seed Dressing

Apple, Pear and Pomegranate Salad

Pomegranates are the perfect winter fruit because they are filled with healthy vitamins that can help you to avoid colds and flu. They also complement other fruits perfectly. Adding them to a fruit salad filled with apples, pears and citrus fruits will produce a wonderful flavor and a salad that is very low in fat and calories and filled with healthy vitamins and minerals.
Recipe and Instructions – Seriouseats
Apple, Pear and Pomegranate Salad

Kumquat and Ginger Fruit Salad

Kumquats are delicious, particularly when they are mixed with navel oranges, mangoes and bananas. You can add these along with bananas, kiwis and pomegranates to make a delicious salad. A little ginger and a vanilla bean really give the salad a wonderful flavor and there are so many fruits included that you can count on loads of vitamins and nutrients that will help you to stave off those winter blues.
Recipe and Instructions – Foodnetwork
Kumquat and Ginger Fruit Salad

Key Lime and Honey Winter Salad

With some oranges, pineapple, kiwi and a yummy poppy seed dressing with key limes, you can quickly and easily make a winter salad that your entire family will love. The pineapple and kiwi give this salad an almost tropical taste and the dressing is light and very low in calories. You can substitute any fruits that you want or add different ones with these to create your own version of this tasty winter salad.
Recipe and Instructions – Barefeetinthekitchen
Key Lime and Honey Winter Salad

Apricot and Fig Winter Salad

Apricots are a yummy winter fruit and when you combine them with figs, pomegranates, apples and pears, you get a fruit salad that is perfect for any season. This winter salad has loads of good for you vitamins and the figs and vanilla bean give it a very wholesome taste. If you love comfort foods, this is a great salad to try out during those snowy days.
Recipe and Instructions – Smittenkitchen
Apricot and Fig Winter Salad