Utensil Holder Jewelry Hanger
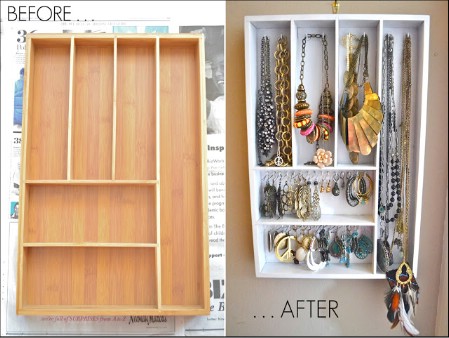
With a wooden utensil hanger, a few hooks and a couple of hours of time, you can create a beautiful jewelry hanger that keeps your jewelry organized and handy. You could use a plastic utensil holder for this, but the wood is much sturdier and more attractive. You basically just put the small hooks on top of the larger columns to hang your necklaces and then put several in the smaller areas for holding earrings. You can hang it on the wall and keep all of your jewelry right where you need it and perfectly organized. No more tangled necklaces or missing earrings.
DIY Instructions and Project Credit – Colormebluefashion
Wood Floor Sample Organizer
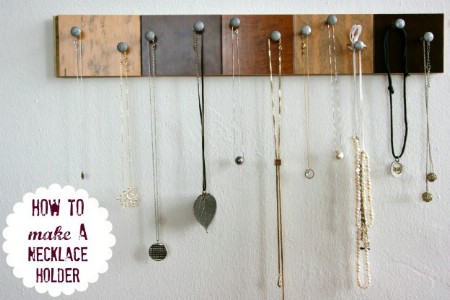
Wood floor samples are around a quarter each at your local home improvement store. You can use a few of these to create a beautiful jewelry organizer that will hang on the wall. You need a collection of samples (or you could just use a board if that's what you have on hand), wood glue, a few screws and something to hang it – Velcro picture strips work well. The screws (and you can buy decorative ones if you want) are what holds all those necklaces and keeps them from getting tangled. Just hang it in the bedroom or bathroom and you'll always have your necklaces perfectly organized.
DIY Instructions and Project Credit – Creatingreallyawesomefreethings
Lace Earring Holder
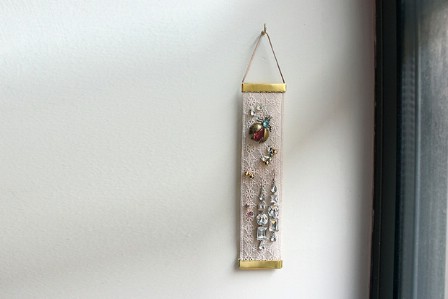
A strip of lace can do wonders for helping you to keep earrings organized. The greatest thing about this project is how it looks so rustic and antique. That's done using teabags to stain the lace and give it an old-word feel. There are very few supplies needed and if you have enough lace, you can create several of these and just hang them all together to keep all of your earrings organized. It's a beautiful, easy project that will take very little time but instantly improve your bedroom or bathroom décor just by having it hanging there.
DIY Instructions and Project Credit – Forthemakers
Drawer Pull Jewelry Storage
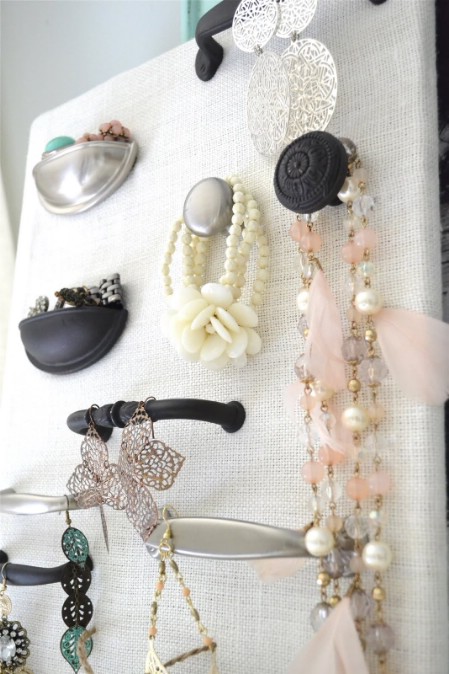
Some old drawer pulls and other hardware can be attached to a board to give you the perfect place for keeping all of your jewelry organized. You need a board, which you can paint or stain any color that fits your current décor. Then just take those old drawer pulls, hinges, and knobs (which incidentally, you can pick up at yard sales and thrift stores for a steal) and attach them in different ways. Create a pattern or just put them wherever you think they'll work best. You get a beautiful place to store and display all of your jewelry and for very little cost.
DIY Instructions and Project Credit – Lizmarieblog
DIY Vintage Jewelry Stand
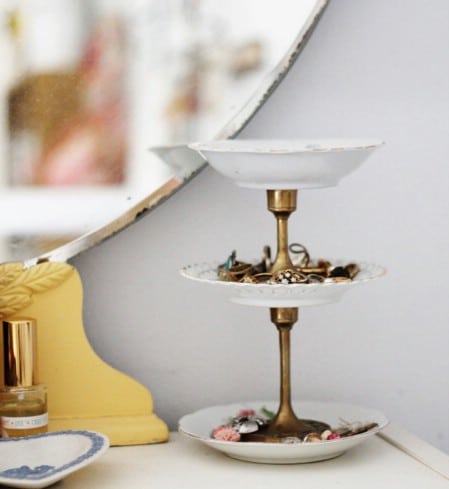
This beautiful vintage jewelry stand can be made with things that you have on hand or you can visit a thrift store or Goodwill store to find the plates and candlesticks that you need. You will need a couple of brass candle sticks and at least three vintage plates. You'll also want some superglue to hold it all together. It looks like the jewelry stand that your grandmother kept her treasured pieces in and it's absolutely gorgeous and really holds quite a few rings, earrings, and bracelets. Just sit it on the dresser or nightstand and keep all of your favorite pieces organized.
DIY Instructions and Project Credit – Acutedesigns
Framed Chicken Wire Jewelry Hanger
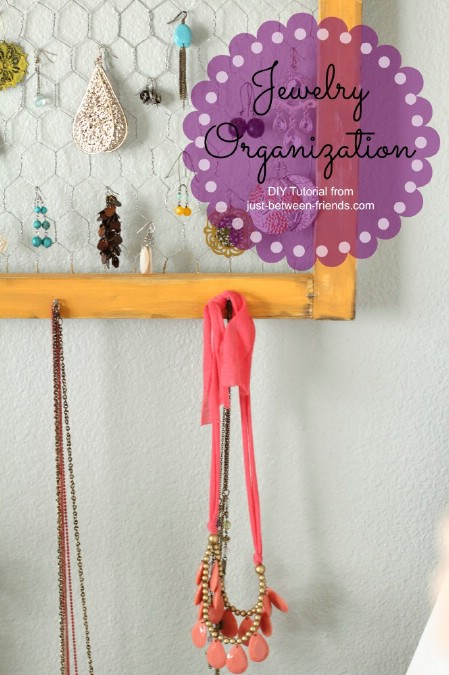
If you have a few pieces of chicken wire on hand, you can create an absolutely stunning hanger for your earrings and other jewelry. You'll need a one-by-two foot piece of chicken wire as well as a few pieces of wood to build the frame. The framed holder hangs with a piece of ribbon or whatever you want to use to hang it and it costs only about $2 to make. Plus, it's relatively easy and will hold loads of jewelry. Add a few small nails or hooks to the wooden part for holding necklaces and bracelets and your earrings will just hang across the wire in the center.
DIY Instructions and Project Credit – Just-between-friends
Deco Board Jewelry Hanger
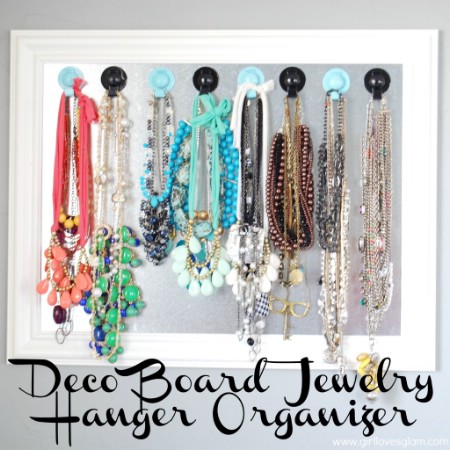
A magnetic board and a few magnetic hangers will give you the perfect place to hang and keep all of your jewelry organized. You can paint the board and the hangers to match your décor and they are perfect for holding necklaces and bracelets. The hangers are just a few dollars each at Wal-Mart and you can find the magnetic board at any office supply store. Or, if you have an old board that you aren't using, you're halfway there and you can just add the hangers to keep your jewelry within reach and untangled at all times.
DIY Instructions and Project Credit – Girllovesglam
Embroidery Hoop Earring Display
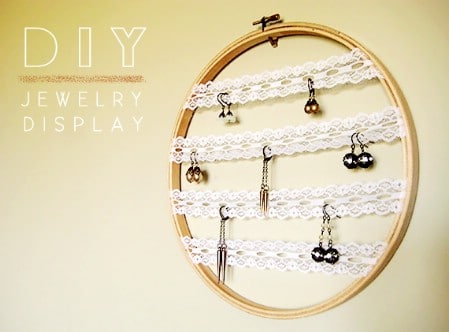
An old embroidery hoop and a few strips of lace give you the perfect place to hang and organize your earrings. You don't even have to glue this one. Just separate the hoop and place the lace ribbon inside before putting it all back together. The hoop hangs perfectly on the wall and you can add as much lace as you need to keep all of your earrings organized. It's beautiful, easy to make, and best of all, cheap. You can literally make one of these in about five minutes and if you have the hoop and lace on hand, it won't cost you anything. You could also use strips of fabric if that's what you have.
DIY Instructions and Project Credit – Bubbyandbean
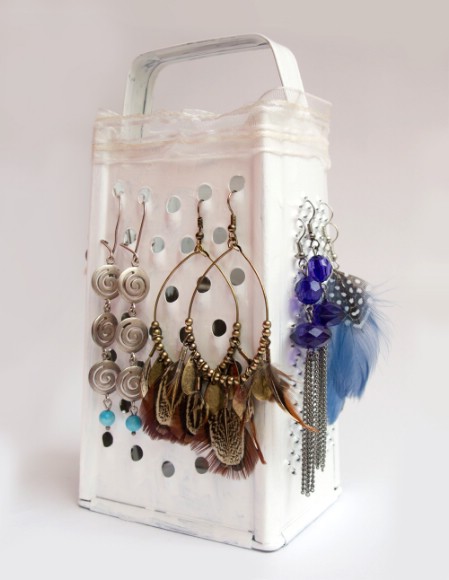
Cheese Grater Earring Display
A cheese grater is the perfect earring holder. Now, we're talking about those full, standup graters that you can buy just about anywhere if you don't already have one that you can use. Paint over the metal if you want and add lace or whatever else you want to make it a bit more decorative. Then just stick your earring backs into the holes in the grater. Voila! Instant earring organization and it takes just a few minutes and won't cost anything if you have an old grater that you can use. Note that this one works best for hanging earrings.
DIY Instructions and Project Credit – Katrinshine
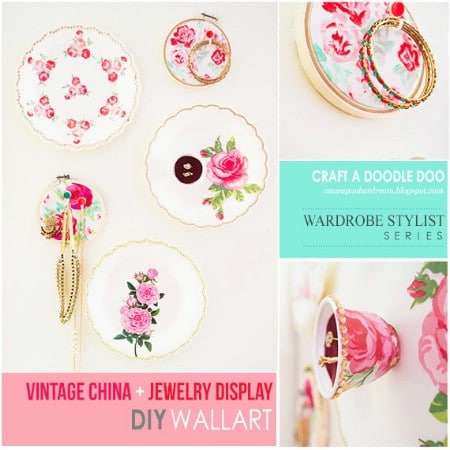
Vintage China Jewelry Display
You can create an absolutely gorgeous jewelry display with a few cheap plastic plates and cups, some temporary tattoos and a few other supplies. The gist of this one is to make those cheap plates and cups look like vintage china, which is done with floral temporary tattoos. Once you have that accomplished, you can fill the cups with foam for sticking earrings and use command hooks or some decorate push pins on the plates to hold necklaces and bracelets. You really have to see this one. You'll find it hard to believe that they started out as cheap plastic.
DIY Instructions and Project Credit – Onceuponherdream
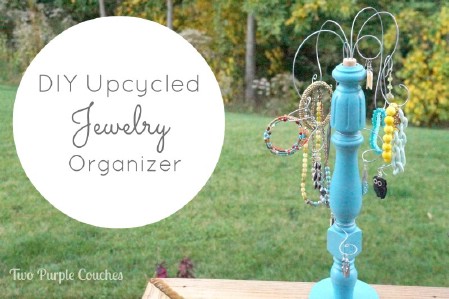
Staircase Spindle Jewelry Holder
If you happen to be replacing your staircase spindle, you've got the makings for the perfect jewelry holder. Even if you don't have a spare spindle sitting around, you can pick them up really cheap at yard sales, flea markets, or any number of thrift stores. You'll need a round piece of wood to hold the spindle up and some wire for hanging your jewelry. This is a beautiful jewelry organizer that you can paint or stain any color you need to match your décor and it's really easy to make. The wires stick out in different places, giving you the perfect place for hanging all of your longer jewelry pieces.
DIY Instructions and Project Credit – Rainonatinroof
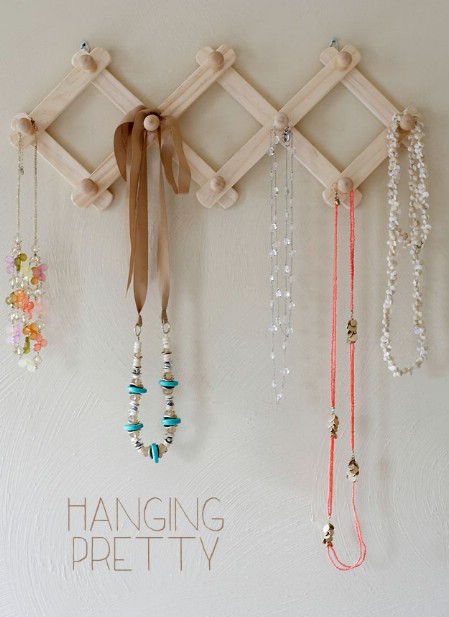
Accordion Jewelry Holder
A wooden accordion rack is a great way to keep your jewelry organized and they are really cheap at the Dollar Store or Dollar Tree. You could also use plastic racks if that's what you want. You can paint or decorate them however you want and then just hang them on the wall to hold necklaces and bracelets. Stack a few of them up the wall to have somewhere to keep all of your longer pieces organized. They make the perfect jewelry organizers and they're really cheap, which is always a good thing. Plus, there's little work involved to turn them into jewelry holders.
DIY Instructions and Project Credit – Caughtonawhim
Kids' Jewelry Organizer
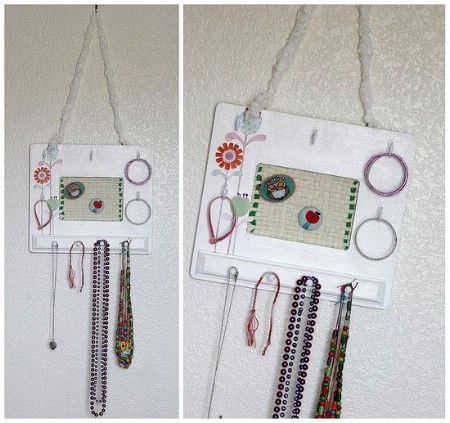
When you're organizing jewelry, you certainly can't forget about the little girls in your life. This kids' organizer is perfect for little necklaces and bracelets and it's very easy to make. You'll need wooden pegs and a frame, which you can get for around $1 each and something to fill in the center. We love the idea of using an old loom to create a place in the center for hanging earrings. This is a really easy project and one that your little one can help you to make and decorate. Just add a little paint or decoupage some pictures on the frame.
DIY Instructions and Project Credit – Tonyastaab
No comments:
Post a Comment