Tuesday, January 31, 2017

35 Ingenious Outdoor Pallet Projects for All Types of DIYers

Patio Benches

Patio Benches
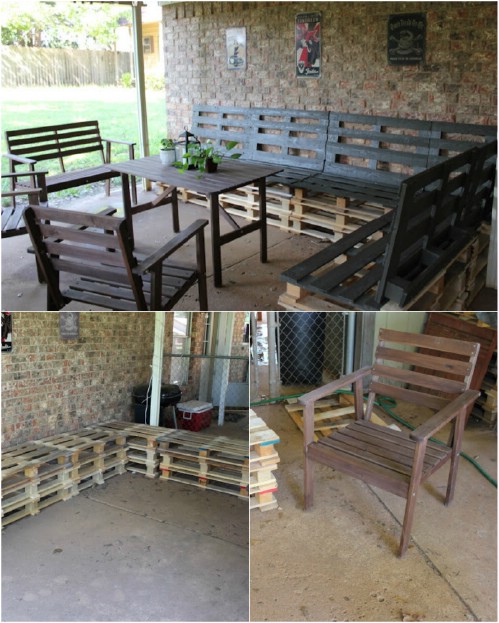
This project is perfect for those of you who have a nice big patio area and love to entertain, since these benches offer a lot of seating space. The completed project cost just $40 and took about six hours to make, so there's really no excuse not to make these!

DIY Instructions and Project Credit – SassySparrow

Swing Bed

Swing Bed
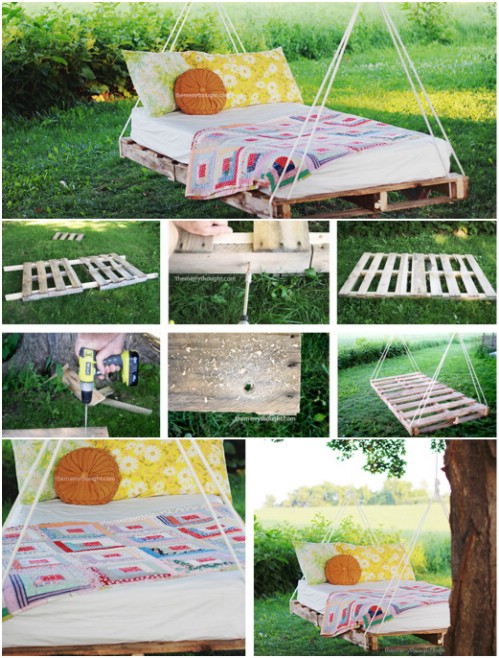
There's something about an outdoor swing bed – it's relaxing, luxurious, calming; the perfect way to spend a lazy, lounging summer's day, enthralled by your latest book. It's like a little slice of heaven right outside your house.

DIY Instructions and Project Credit – TheMerrythought

Succulent-Center Table

Succulent-Center Table
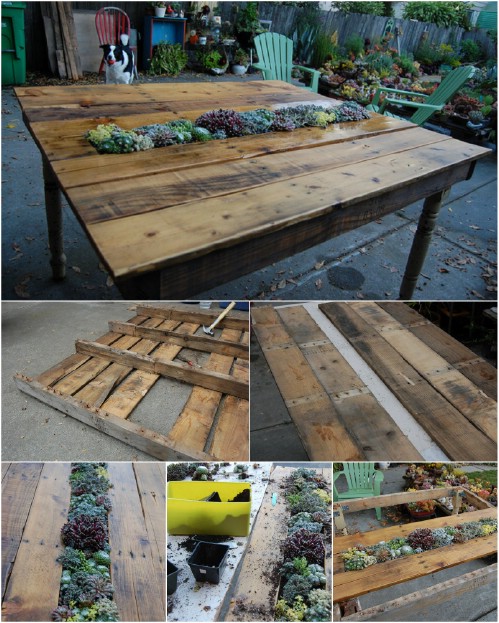
What better way to decorate an outside table than with a striking nature-themed feature in the middle? The planting box in the center is just magnificent, and the use of succulent plants is very clever because not only do they look great, but their also very low-maintenance.

DIY Instructions and Project Credit – FarOutFlora

Day Bed

Day Bed
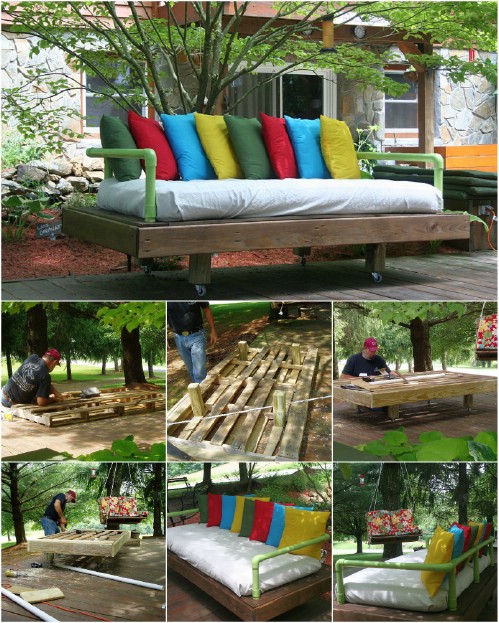
What's better than spending a lovely day outside relaxing on your day bed, taking in the beauty of the nature around you, enjoying your solitude or perhaps watching the kids play around? This pallet day bed is perfect for this scenario. What makes this specific bed really cool, in my opinion, is the use of PVC piping as a rail.

DIY Instructions and Project Credit – OndawaytoSomewhere

Gardening Organizer

Gardening Organizer
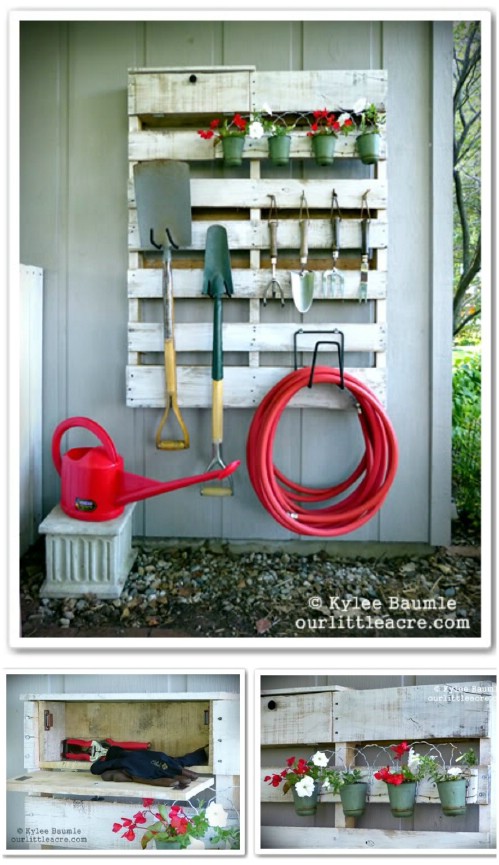
I like this project because instead of disassembling the entire pallet, you're using its regular shape to your advantage and simply adding a few things to improve it. What you get is a fantastic organizer to keep all your tools safe in one place and out of the way.

DIY Instructions and Project Credit – OurLittleAcre

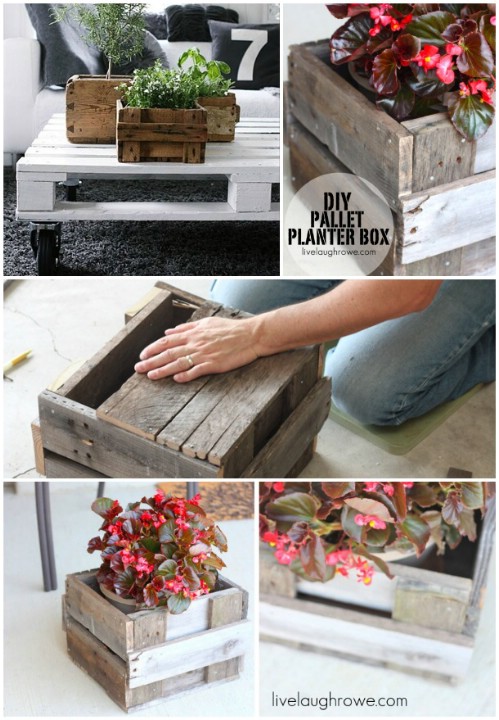
Single Planter Box

Single Planter Box
This is such a cute little project that won't take up too much of your precious time. I picture having two of these – one on either side of the stairs leading up to the front door. It would make the perfect entrance welcome!

DIY Instructions and Project Credit – LiveLaughRowe

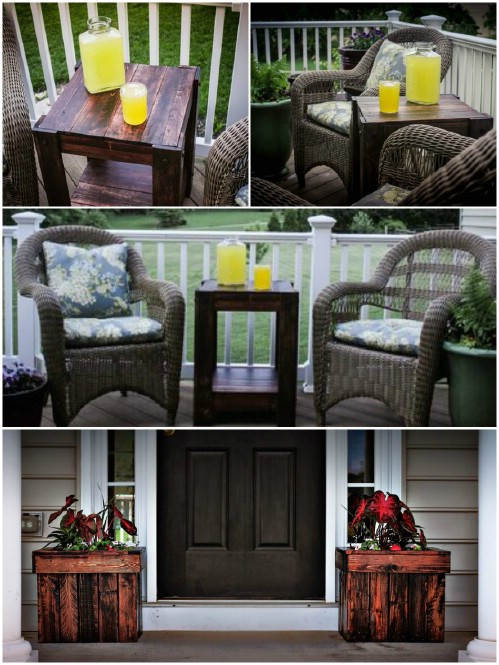
End Table and Planters

End Table and Planters
What I really like about this project is the simplicity of it all. If you don't have a big porch but still want a small table to rest your drinks or books on, then this small pallet end table is just the thing you need.

DIY Instructions and Project Credit – Instructables

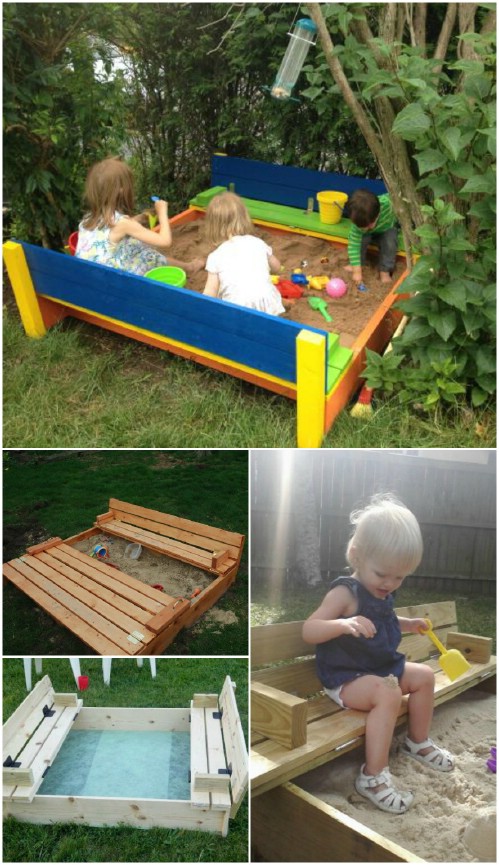
Sandbox

Sandbox
This is a truly innovative project – of all the things that you can make from pallet wood, a self-contained sandbox is not something I would've ever thought of myself. The closing lid ensures that it doesn't get littered with leaves or other debris, and when the lid is opened it creates a nice little seat for the playful kiddies. Absolutely brilliant!

DIY Instructions and Project Credit – Ana-White

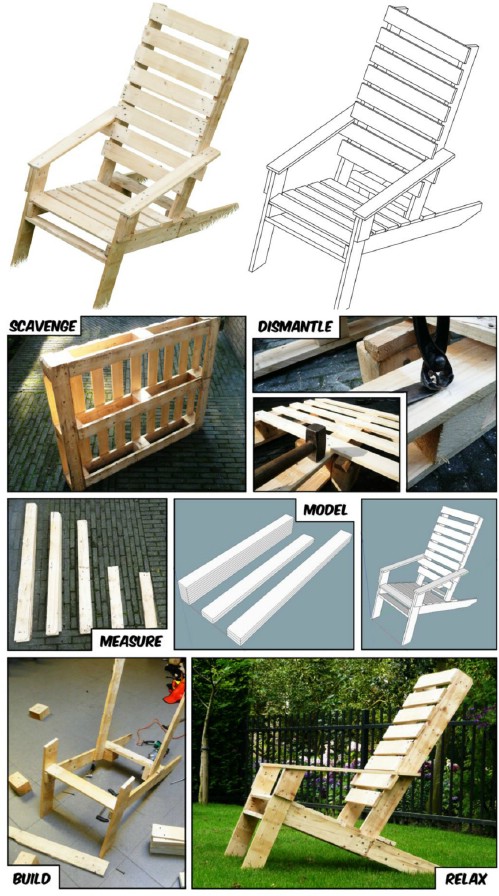
Simple Adirondack Chair

Simple Adirondack Chair
You only need one single pallet to create this beautifully simple and rustic outdoor chair. You just need to download the model to get started, and for those of you who have concerns about dismantling the pallet properly, there tutorial features a link to some helpful tips for this important step.

DIY Instructions and Project Credit – Instructables

Hanging Chair

Hanging Chair
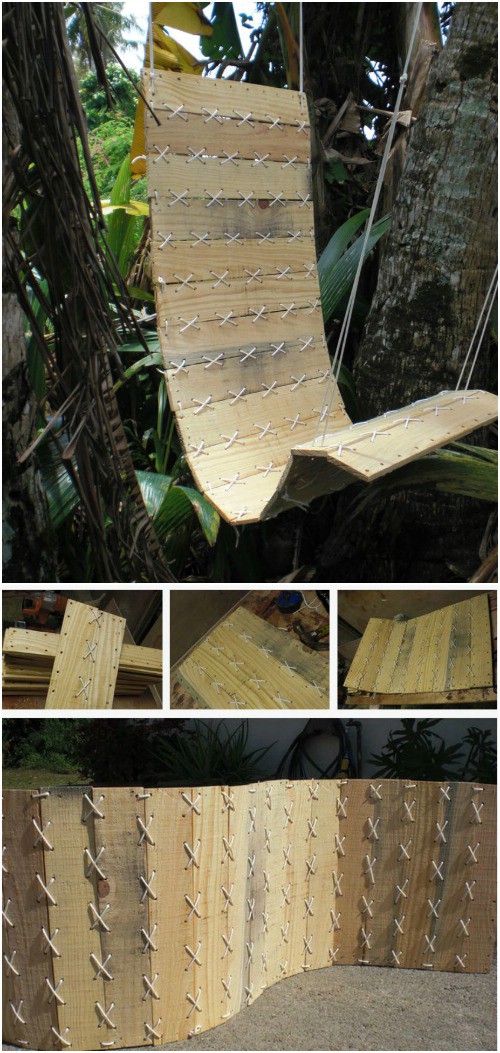
I've seen my fair share of pallet chair tutorials, but I have honestly never seen one as awesomely creative, clever and truly unique as this one. It's almost like a hammock, but from wood. And although that may sound uncomfortable, the wood panels actually conform to your body when you sit, so it's very comfy. This one's definitely going on my 'To Do' list!

DIY Instructions and Project Credit – Instructables

Gabion Table and Bench

Gabion Table and Bench
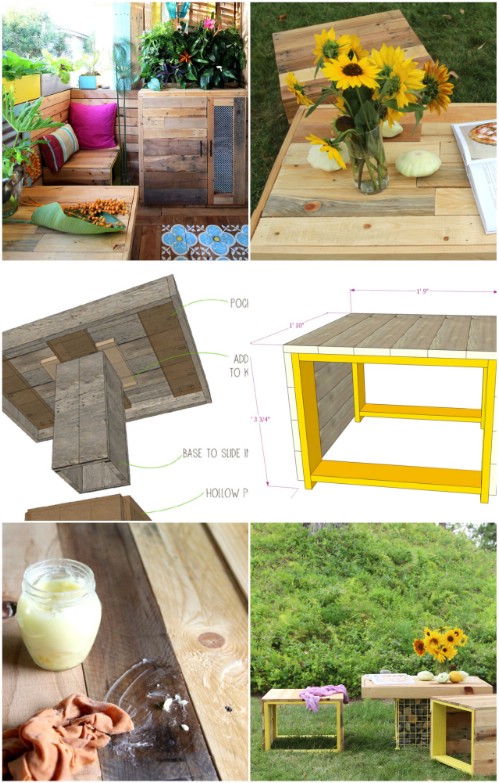
A gabion is like a cage that is usually filled with rocks or concrete; in this case, it's the gabion that makes this bench and table combo so unique and eye-catching. And I just love the clever, subtle pop of color.  This looks like the perfect way to enjoy your morning coffee (or tea, in my case)!

DIY Instructions and Project Credit – APieceOfRainbow

Bar with Stools

Bar with Stools
What I really like about this project is the way that the stools were constructed – I love the boxy look which deviates from the usual open-legged stools. The design is simplistic, neat and bold, and of course, a fantastic addition to any outdoor area.

DIY Instructions and Project Credit – StackedDesign

Corner Lounge Suite

Corner Lounge Suite
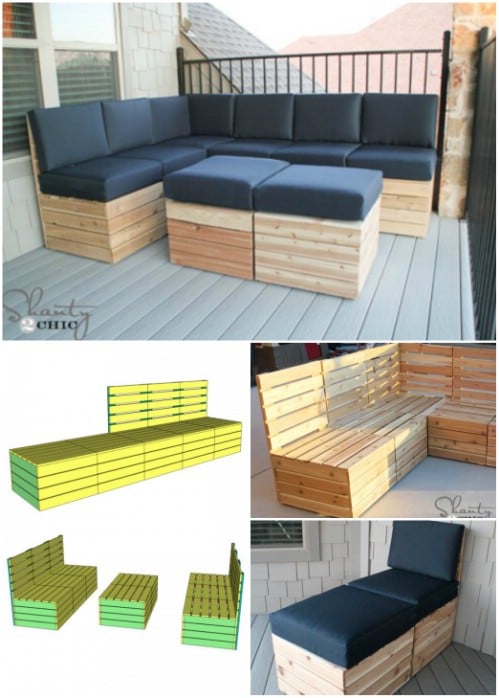
This finished project just oozes modern chicness; it's absolutely beautiful! And what's great is that you can rearrange the seats if you get bored. This project is ideal for any balcony or patio that you'd like to put to good use – you'll be spending a lot more time out there once you have this lovely furniture to relax on.

DIY Instructions and Project Credit – Shanty2Chic
3 Surprising Uses for Hydrogen Peroxide around the House

3 Surprising Uses for Hydrogen Peroxide around the House
What do you usually use hydrogen peroxide for? As an antiseptic for minor cuts, or whitening your teeth, perhaps? This simple chemical compound is actually a lot more useful than you may think. The unassuming bottle of 3% concentration that you can buy at any pharmacy can actually also save you a lot of money. As long as you familiarize yourself with all its many benefits—seriously, there are over 50 uses!—you can skip out on having to buy other expensive specialized products.
Video Instructions:

Video by The Savings Experiment

Sweat Stain Removal

Those yellowish sweat stains can be a little embarrassing, and they can ruin your clothes, but you can actually get them off without harsh chemicals. In a spray bottle, combine one part dishwashing liquid with two parts hydrogen peroxide, mix, spray the stains, and then rinse it off after 30 minutes. Super easy!

Disinfect Toothbrush

The bristles on your toothbrush is actually quite an ideal breeding ground for bacteria and germs, so it's a good idea to disinfect it every now and then. All you have to do is soak the bristles in a cup of hydrogen peroxide for a few minutes, and then rinse it well with hot water.

Get Rid of Mold

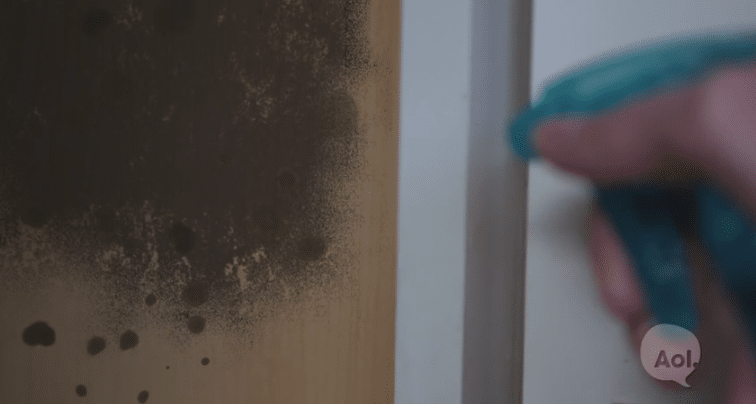
Mold in the home can be dangerous, so if you happen to find some, spray it directly with hydrogen peroxide, let it sit for 10 minutes and then simply wipe it off. The antifungal and antibacterial properties of this compound means that you can also use it to clean and disinfect your cutting boards and countertops.

Vinegar is almost as versatile as hydrogen peroxide is so it may be worth your while to have a look at these 10 household uses for vinegar. I'm always happy when I can use one product in many ways, especially if it means that I get to avoid the harsher chemicals.

How to Make Delicious and Refreshing Sorbet in just 5 Minutes!

How to Make Delicious and Refreshing Sorbet in just 5 Minutes!
How do you like to cool down on a hot summer's day when the sun is beaming down on you? Sip on a cold cocktail? Take a dip in the pool? Turn on your air conditioning? How about an icy, tasty mouthful of sorbet? If you don't have any in the freezer and really don't feel like going to down to buy some, you can actually whip up some homemade sorbet, and all it'll take is a mere five minutes of your precious time.

Video Instructions:

Video by Handimania’s Youtube Channel.

You will need:

  • 1 cup 100% fruit juice – any flavor of your choosing
  • 2 Ziploc bags – one small and one larger
  • 2 cups ice
  • 1 cup salt
  • 1 cup water

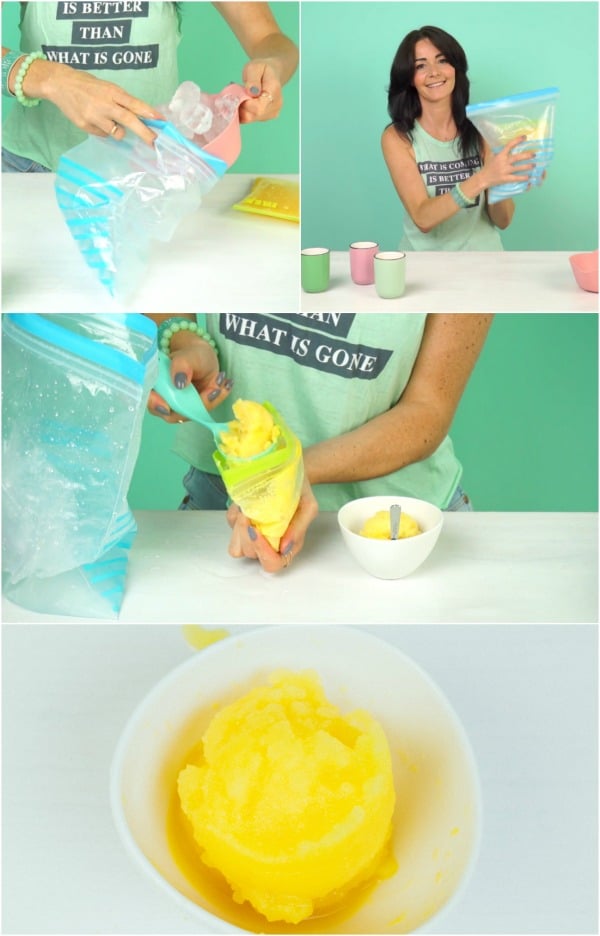
The process is really easy, shockingly easy, in fact. First you pour your juice into the small bag and make sure that it is sealed properly. Then, in the larger bag, put in the ice, salt and water. Place the small bag inside the big one, seal it up and then get those arm muscles working by shaking it all up, rather vigorously, for five full minutes. Once the time is up you can remove the bag of juice, which you'll notice has now magically turned into flavored ice, or sorbet. Easy as that! Get yourself a spoon and dish it out into a bowl so that you can enjoy your frozen snack.

You can actually use this same method to make ice cream, too, you just need a few different ingredients.

Summer Fun with the Kids: How to Make Giant Homemade Bubbles

Summer Fun with the Kids: How to Make Giant Homemade Bubbles...
I feel quite confident that I can say with certainty that all kids love bubbles. In fact, I still love playing with bubbles! It was always such a treat when my parents would bring home a little tub for us to play with, but for the most part, we just made our own concoction of water and liquid soap, and then simply bent a piece of wire to use as the wand. Bubbles remind me of summertime, so if you want to do something fun with your kids outside, here's a cool way to make some gigantic bubbles with the same homemade concept.

Video Instructions:

Video by WhatsUpMoms Youtube channel.

You will need:

  • 8oz (1 US cup, or 236ml) liquid dish soap
  • 1 tablespoon guar gum
  • 1 tablespoon baking powder
  • 16 cups water
  • Cotton string or rope (85in, but you can go even bigger if you want to!)
  • 2 sticks
  • Metal washer
  • Large container

I may not have kids of my own, but I'll definitely be doing this for myself so that I can release my inner child! If you're looking for some more summer ideas, perhaps make a fun water blob for the kids or build a swing bench from where you can watch them play.

Directions:

Mix the soap, gum and baking powder in your container and stir well, then add in the water and give it a good whisk. Like me, you may be used to just liquid soap and water, but in this case, the guar gum gives the bubbles extra elasticity, and the baking powder makes it so that the bubbles last longer and don't pop quite as quickly. This solution will last a few weeks as long as you keep it covered.

For the wand, tie the string to the top of one stick, slip through the washer, and then loop and tie the other end to the top of the other stick. When you lay this out, the string should form a triangle with the washer pulling a point down. If everything looks good, then just close it up by connecting the two ends of the string.

When it comes to actually making the bubbles, hold your two handles together and carefully dip the string into the soapy solution – make sure it doesn't get tangled. Then when you lift it out, slowly pull the handles apart and you'll see your big bubble starting to form.

20 Cleverly Creative Ways to Display Your Cherished Photos

20 Cleverly Creative Ways to Display Your Cherished Photos - Really good projects!
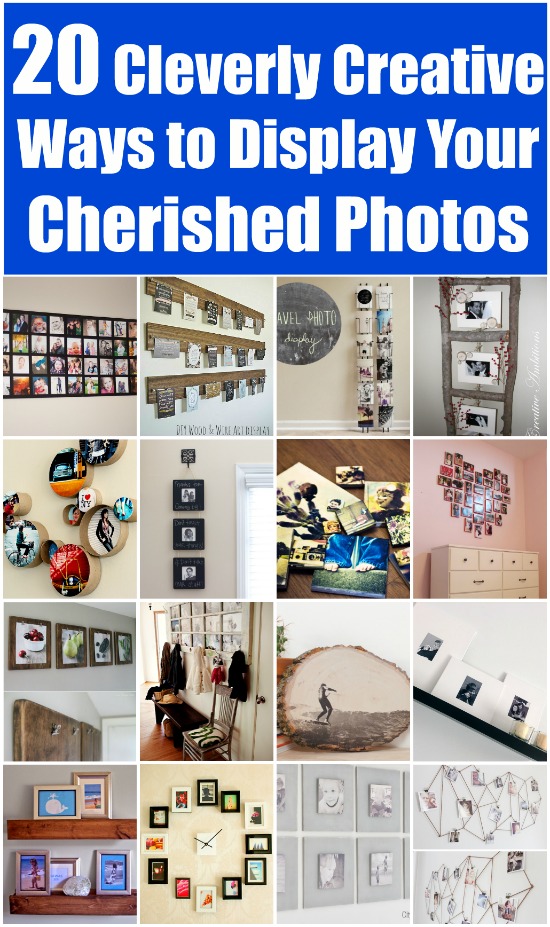
Now that absolutely every mobile phone comes equipped with at least one camera, we're all taking a lot more photos than we used to when we only had regular cameras to rely on. Narcissistic selfies aside, the accessibility of being able to snap anything, anytime, anywhere really is a blessing as you can immortalize special moments which, when you look over them, have the power to bring back all the wonderful feelings of that instant. Instead of simply uploading them all to social media, why not adorn your home with these incredible memories that you've captured in time?

I've rounded up some of the most creative, fresh and fun ways to display your photos around the house so that they really become a feature rather than fading into the background.

Handmade Ladder

Handmade Ladder - 20 Cleverly Creative Ways to Display Your Cherished Photos
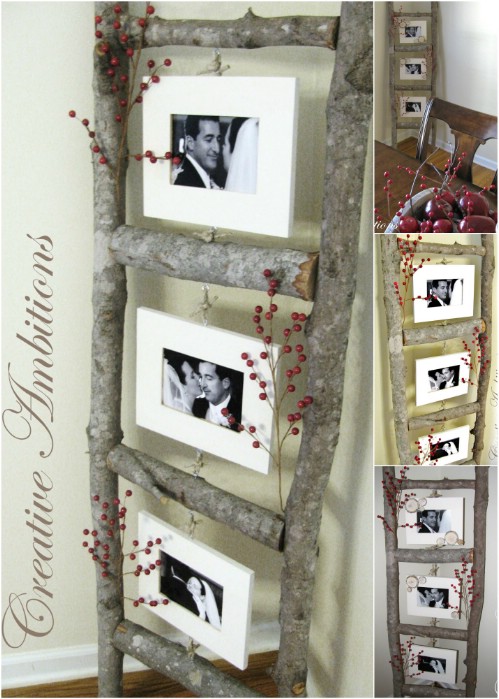
I've seen old ladders transformed into photo holders, but this one made from scratch really takes the cake. The homely, rustic appeal of the logs perfectly displays those beautiful memories you've created. Although this looks lovely propped up against a wall, I'd even consider actually hanging it horizontally higher up on the wall.

DIY Instructions and Project Credit – CreativeAmbitions

Hanging Chalkboard Frame

Hanging Chalkboard Frame - 20 Cleverly Creative Ways to Display Your Cherished Photos
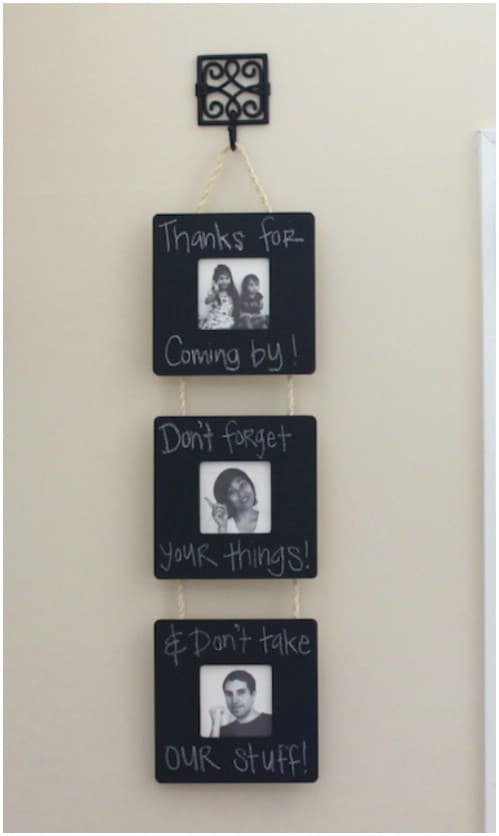
I'm a sucker for chalkboard paint in crafts, and the whimsical nature of this project really is just so fun and cute. Another way to run with this idea is to add a lot more than just three photos, and then write a little personalized description or note around each one.

DIY Instructions and Project Credit – SimplyModernMom

Photo Collage

Photo Collage - 20 Cleverly Creative Ways to Display Your Cherished Photos
I love this collage idea because it looks like one massive frame, but it's actually just photos stuck on a foam core board and sealed in with Mod Podge. Not only that, but it's easy on the wallet, too. Since the example photos are in color I like the black background, but if you find a color that ties all your photos together then don't be afraid to go for it.

DIY Instructions and Project Credit – BitsOfEverything

Round Cardboard Frames

Round Cardboard Frames - 20 Cleverly Creative Ways to Display Your Cherished Photos
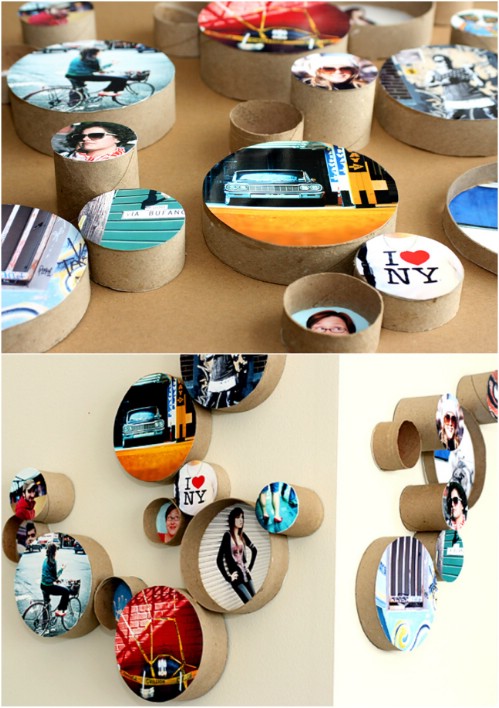
This project is repurposing creativity at its best: hold on to your empty paper towel and toilet rolls to make these easy and clever frames of varying sizes. If you're not a fan of the natural color just paint both the inside and outside before adding the photo; you can even funk it up a little by painting the inside and outside two different colors.

DIY Instructions and Project Credit – Photojojo

Shadowbox Magnets

Shadowbox Magnets - 20 Cleverly Creative Ways to Display Your Cherished Photos
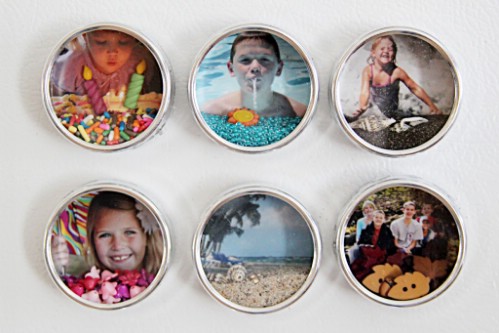
Instead of displaying your photos on the wall, why not go old school and put them on the fridge? I absolutely adore this little shadowbox idea because you can include some bits and bobs to add a whole new dimension and quality to your beloved snaps.

DIY Instructions and Project Credit – CraftsUnleashed

Wood and Wire Display

Wood and Wire Display - 20 Cleverly Creative Ways to Display Your Cherished Photos
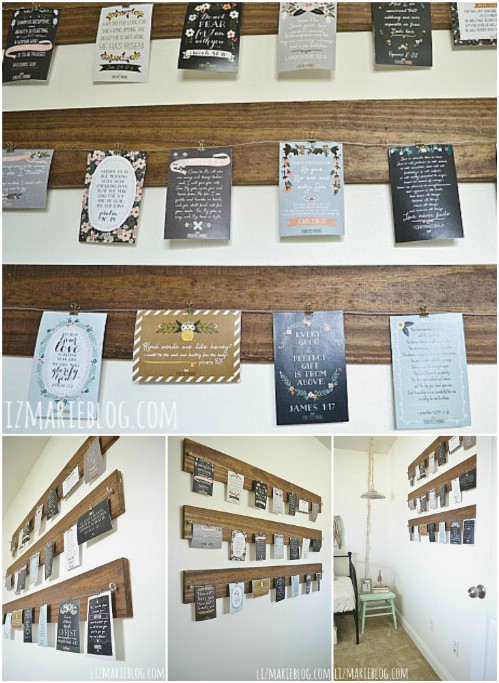
This display has a real rustic charm that I just can't pry myself away from. Of course, you can use it to hang just about anything, but I think this is perfect for some memorable family photos. All you indecisive crafters will love this one because the photos aren't permanent: you can switch them up as often as you like.

DIY Instructions and Project Credit – LizMarieBlog

Clipboard Gallery Wall

Clipboard Gallery Wall - 20 Cleverly Creative Ways to Display Your Cherished Photos
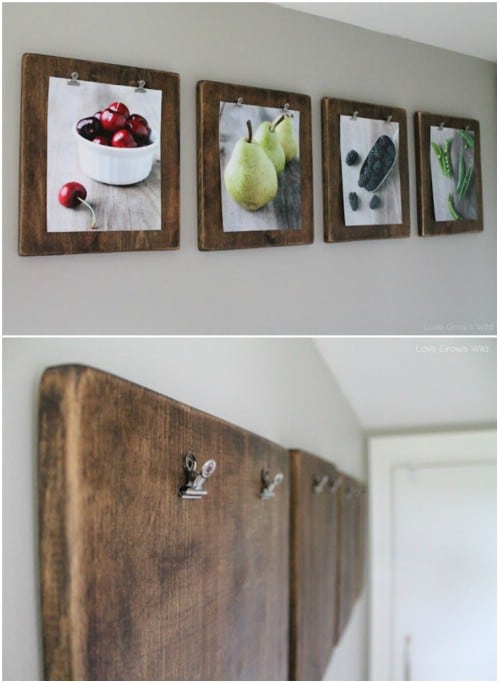
The idea of using a clipboard to display a photo may not be all that new, but this tutorial shows you how to make your own thick, sturdy clipboards that look beautifully aged. The dark stain will really make the colors in your photos pop with vibrancy.

DIY Instructions and Project Credit – LoveGrowsWild

Photo Clock

Photo Clock - 20 Cleverly Creative Ways to Display Your Cherished Photos
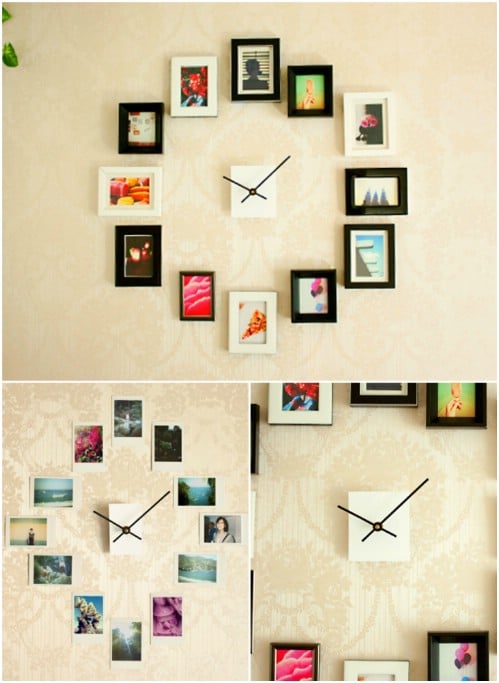
So not only can you arrange your favorite pictures on your wall, but you can actually turn a purely visual display into a functional clock! I kind of wish I had thought about this one before. Use any method you want for the 12 photos (canvasing, simple framing etc.); you can even switch it up!

DIY Instructions and Project Credit – Photojojo and Arts&Crackers

Recycled Door

Recycled Door - 20 Cleverly Creative Ways to Display Your Cherished Photos
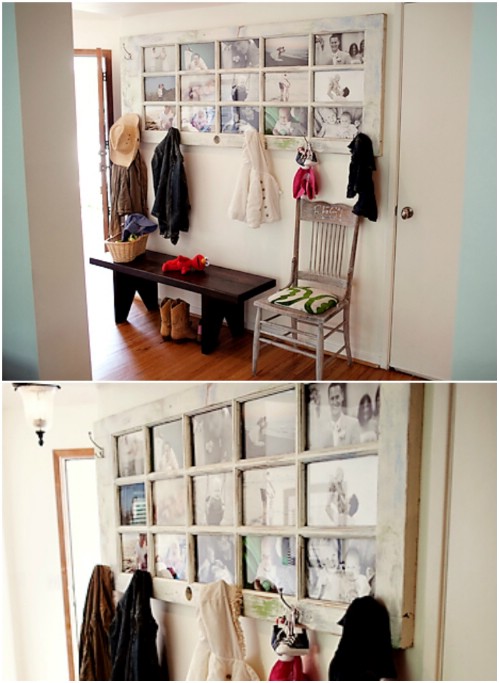
This project is, by far, my absolute favorite. The repurposed door is just stunning (and genius!), and I love the quirky, clever idea of doubling it up as a coat rack. Now I just need to get to a secondhand store to find myself the perfect door!

DIY Instructions and Project Credit – PhotogMommie

Heart Collage

Heart Collage - 20 Cleverly Creative Ways to Display Your Cherished Photos
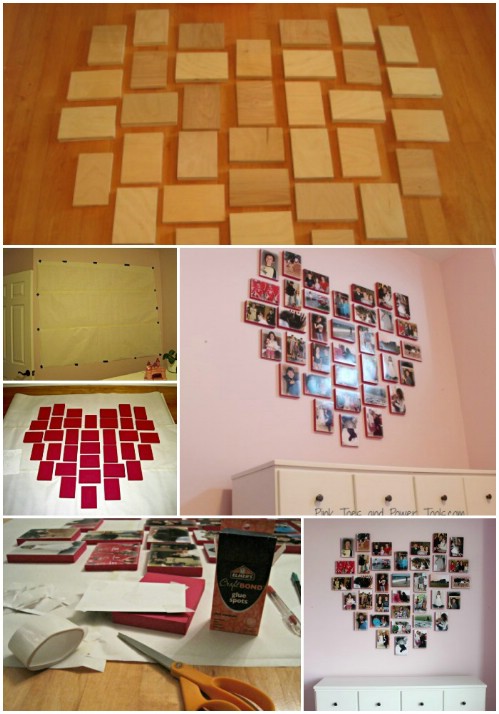
Put your heart on the wall—literally—with this fantastic scrap wood tutorial. Of course, you can create any shape that you want, from circles to stars to letters, but since my photos represent memories that are dear to my heart, I think the shape is rather fitting.

DIY Instructions and Project Credit – PinkToes&PowerTools

Chalkboard Wall

Chalkboard Wall - 20 Cleverly Creative Ways to Display Your Cherished Photos
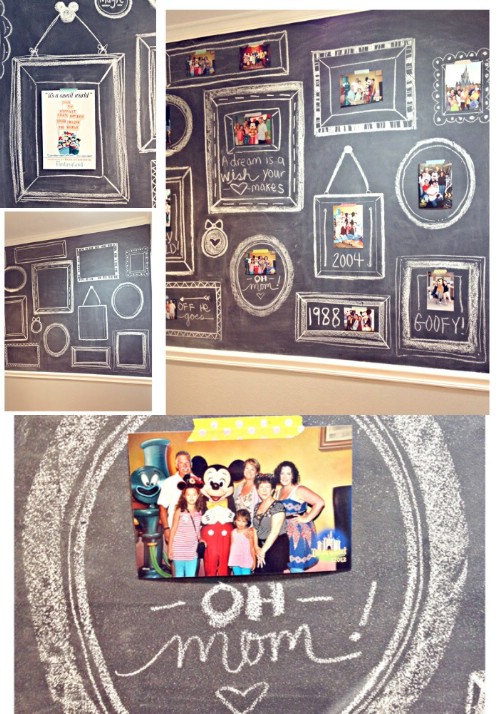
Instead of framing each picture and hanging them up, you can really let the creative juices flow by painting a wall with chalkboard paint, and then drawing your own frames to match your photos. This is such an imaginative way to exhibit your photos while adding some context to them, and I love he fact that you can change it up as often as you like.

DIY Instructions and Project Credit – IAmDoe

Chalk Paint Wood Board

Chalk Paint Wood Board - 20 Cleverly Creative Ways to Display Your Cherished Photos
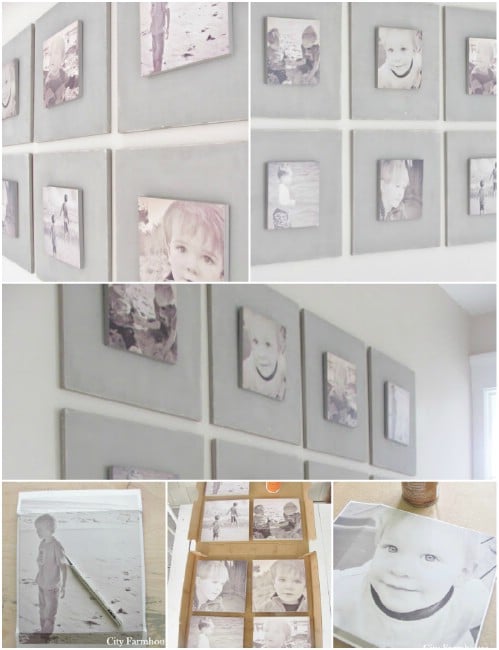
Chalk paint seems to be growing in popularity so I just love how it is incorporated into this project (I've got some great tutorials for DIY chalk paint if you want to make your own). The detailed instructions are easy to follow and can all be done for around $40!

DIY Instructions and Project Credit – CityFarmhouse

Geometric Wiring

Geometric Wiring - 20 Cleverly Creative Ways to Display Your Cherished Photos
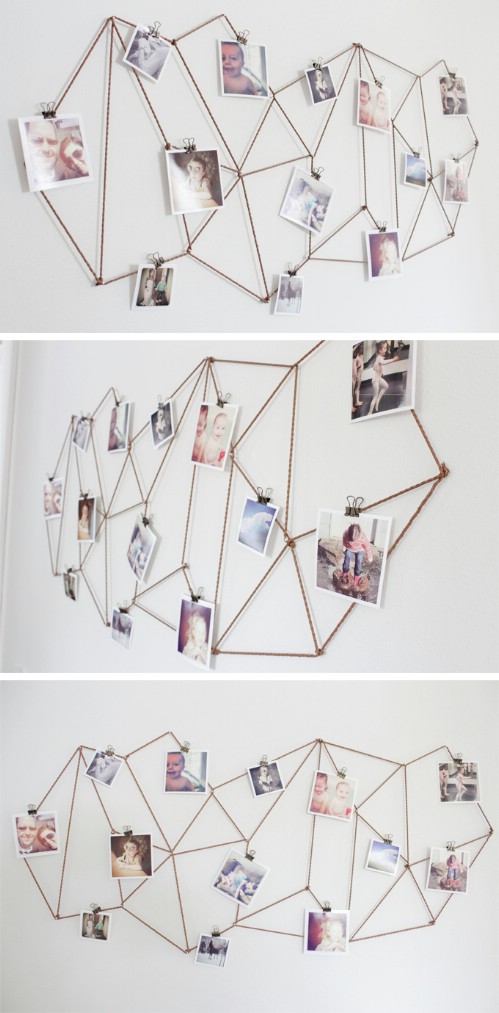
This is a really fresh and modern way to show off your prized photos. The geometric design is fabulous, and there's so much wiggle room in the idea: you can create a similar shape, or you can go wild and create something totally different, like a chevron pattern or a more traditional shape.

DIY Instructions and Project Credit – TheCaldwellProject

Barn Beam Shelves

Barn Beam Shelves - 20 Cleverly Creative Ways to Display Your Cherished Photos
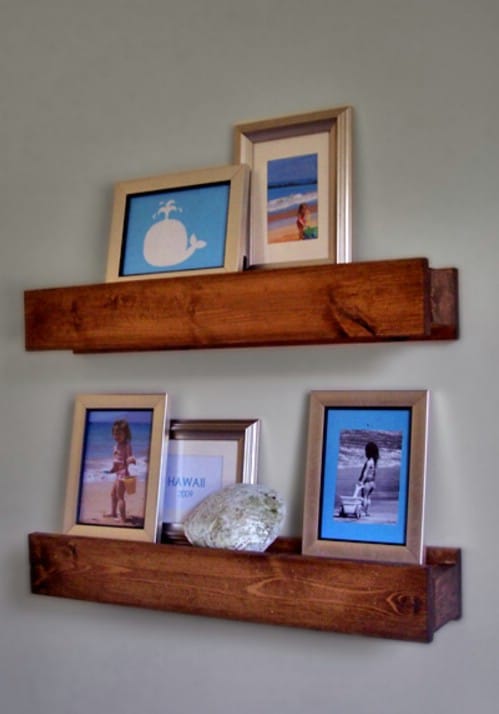
I love the character that is injected into a home by these faux barn beams. Get your hands on some wood boards and a fantastic stain to really get that barn look and you'll have yourself a real eye-catching focal piece for photos.

DIY Instructions and Project Credit – AnaWhite

Wood Slice

Wood Slice - 20 Cleverly Creative Ways to Display Your Cherished Photos
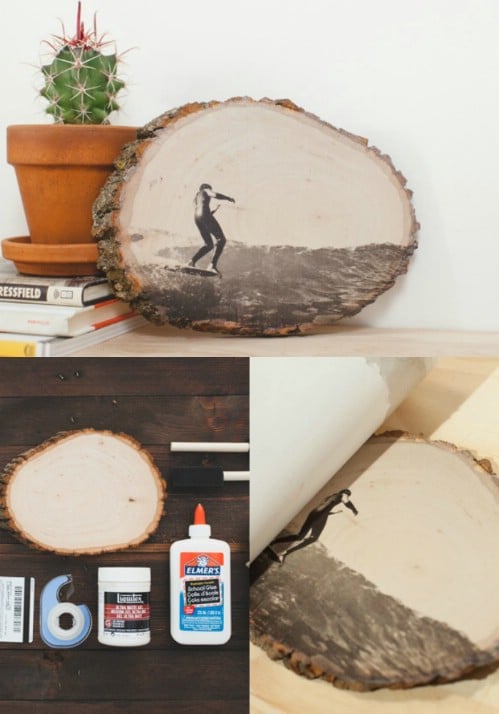
Transferring your photo onto a regular wooden slab is pretty cool, but if you really want that full natural feel, transfer the image onto a genuine log slice. A couple of these displayed on a wall or shelf will be a definite focal point in your home!

DIY Instructions and Project Credit – EHow

Postcard Racks

Postcard Racks - 20 Cleverly Creative Ways to Display Your Cherished Photos
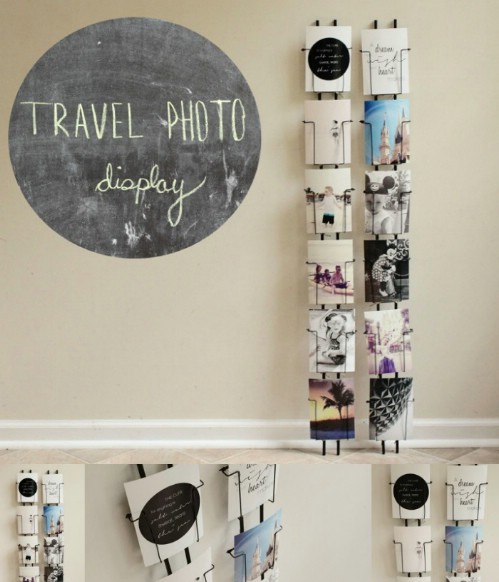
Whenever I travel, I always make sure to take a few postcards from those wire racks (either to hoard or actually create something beautiful) as mementos of the trip. This incredible project channels that same idea, thus making it the perfect display for all your travelling photos!

DIY Instructions and Project Credit – KristanLynn

Canvas Frames

Canvas Frames - 20 Cleverly Creative Ways to Display Your Cherished Photos
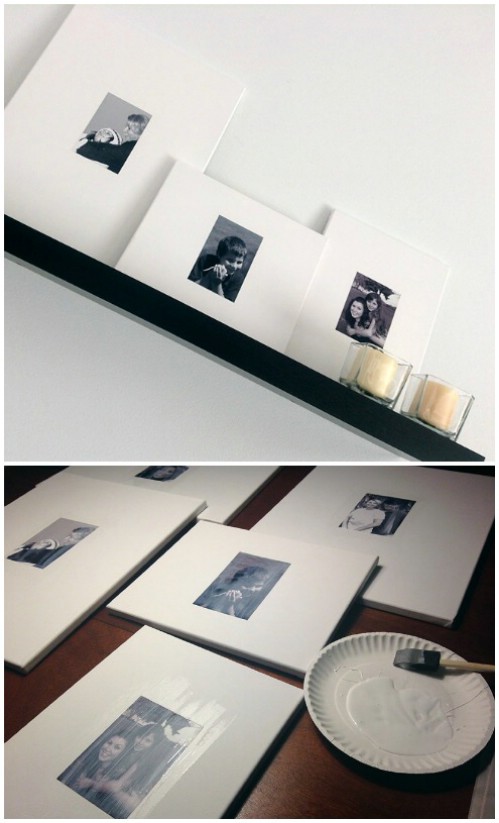
The simplistic and minimalist approach is what really drew me to this tutorial. All you really need to do is glue your photo in the center of each canvas, finish it off with a matte or gloss look, and then find the perfect spot to display your modern photo gallery.

DIY Instructions and Project Credit – TheBudgetDecorator

Vintage Canvases

Vintage Canvases - 20 Cleverly Creative Ways to Display Your Cherished Photos
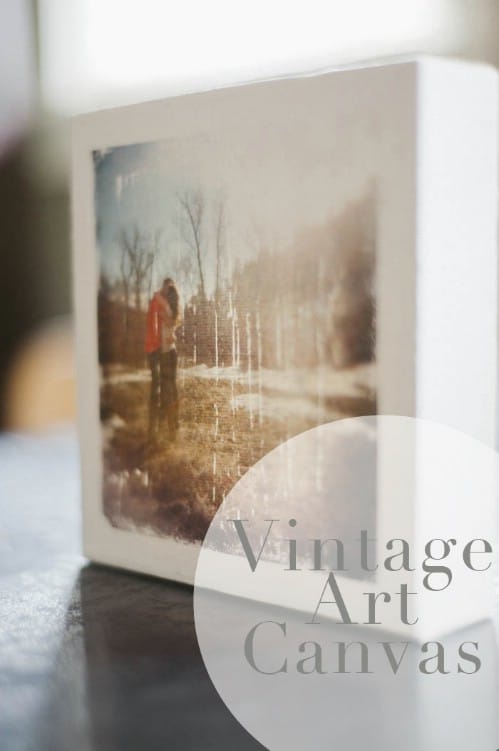
Make your photo look like vintage canvas paintings with this cool method. Repeat the process with a few of your favorite photos to create a nice big collection.

DIY Instructions and Project Credit – RachelGracePhotography

Ceramic Tiles

Ceramic Tiles - 20 Cleverly Creative Ways to Display Your Cherished Photos
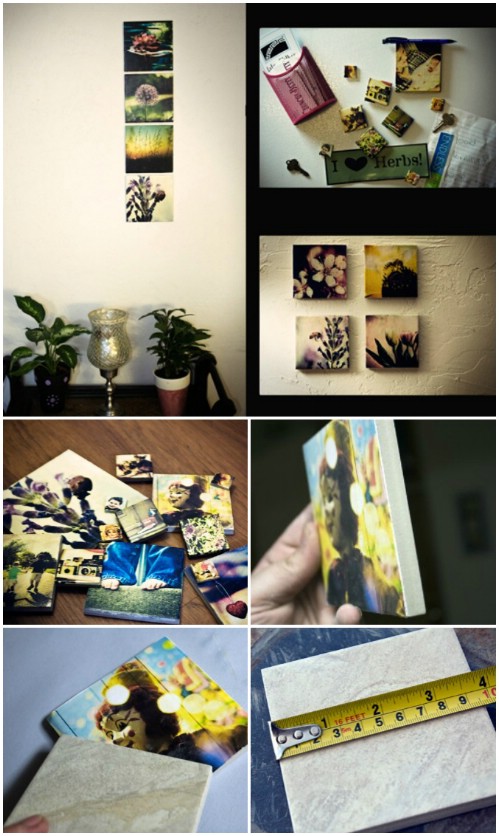
As much as I love photos on canvases, we can all agree that it isn't a particularly fresh concept. I find this ceramic tile idea so clever… not to mention easy, and affordable!

DIY Instructions and Project Credit – CrunchyBetty

Photo Mobile

Photo Mobile - 20 Cleverly Creative Ways to Display Your Cherished Photos
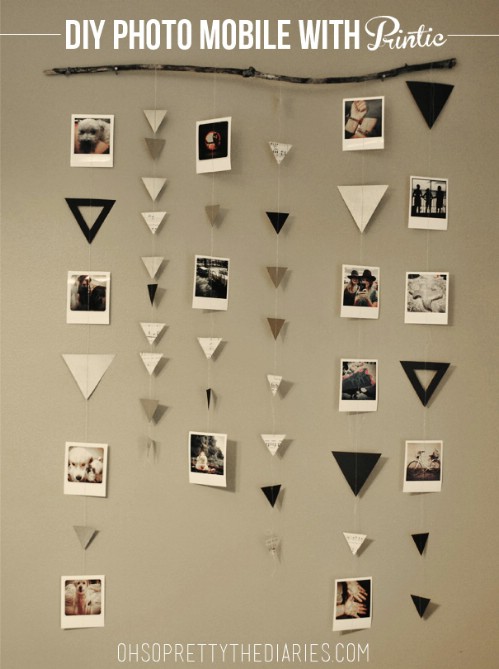
The versatility of this photo mobile is what really attracts me; you can hang all sorts of shapes and cutouts from any paper style or color that suits you and your home. If you like projects that really give you that room to spread your creative wings, then this one is a must.

DIY Instructions and Project Credit – HeyWanderer

25 Brilliant DIY Jewelry Organizing and Storage Projects

Utensil Holder Jewelry Hanger

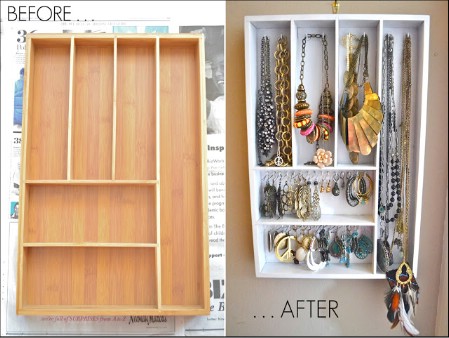
With a wooden utensil hanger, a few hooks and a couple of hours of time, you can create a beautiful jewelry hanger that keeps your jewelry organized and handy. You could use a plastic utensil holder for this, but the wood is much sturdier and more attractive. You basically just put the small hooks on top of the larger columns to hang your necklaces and then put several in the smaller areas for holding earrings. You can hang it on the wall and keep all of your jewelry right where you need it and perfectly organized. No more tangled necklaces or missing earrings.

DIY Instructions and Project Credit – Colormebluefashion

Utensil Holder Jewelry Hanger

Wood Floor Sample Organizer

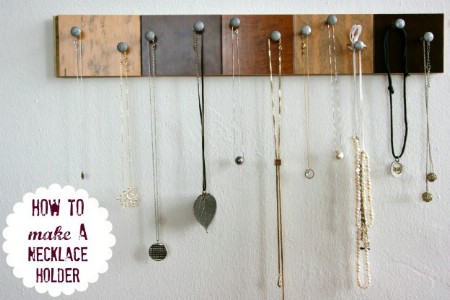
Wood floor samples are around a quarter each at your local home improvement store. You can use a few of these to create a beautiful jewelry organizer that will hang on the wall. You need a collection of samples (or you could just use a board if that's what you have on hand), wood glue, a few screws and something to hang it – Velcro picture strips work well. The screws (and you can buy decorative ones if you want) are what holds all those necklaces and keeps them from getting tangled. Just hang it in the bedroom or bathroom and you'll always have your necklaces perfectly organized.

DIY Instructions and Project Credit – Creatingreallyawesomefreethings

Wood Floor Sample Organizer

Lace Earring Holder

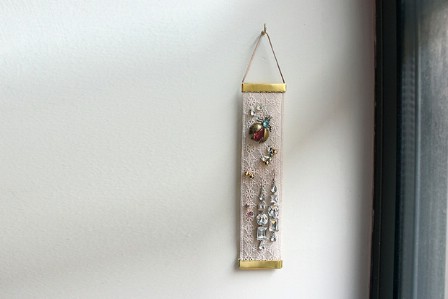
A strip of lace can do wonders for helping you to keep earrings organized. The greatest thing about this project is how it looks so rustic and antique. That's done using teabags to stain the lace and give it an old-word feel. There are very few supplies needed and if you have enough lace, you can create several of these and just hang them all together to keep all of your earrings organized. It's a beautiful, easy project that will take very little time but instantly improve your bedroom or bathroom décor just by having it hanging there.

DIY Instructions and Project Credit – Forthemakers

Lace Earring Holder

Drawer Pull Jewelry Storage

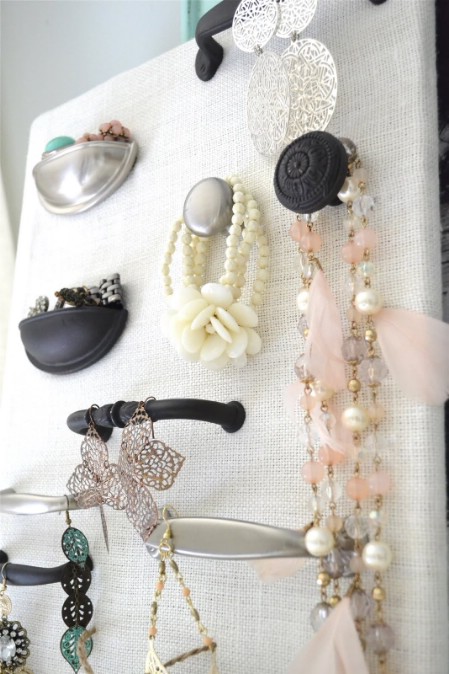
Some old drawer pulls and other hardware can be attached to a board to give you the perfect place for keeping all of your jewelry organized. You need a board, which you can paint or stain any color that fits your current décor. Then just take those old drawer pulls, hinges, and knobs (which incidentally, you can pick up at yard sales and thrift stores for a steal) and attach them in different ways. Create a pattern or just put them wherever you think they'll work best. You get a beautiful place to store and display all of your jewelry and for very little cost.

DIY Instructions and Project Credit – Lizmarieblog

Drawer Pull Jewelry Storage

DIY Vintage Jewelry Stand

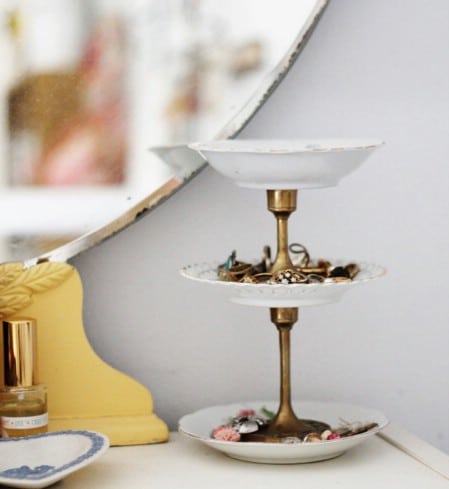
This beautiful vintage jewelry stand can be made with things that you have on hand or you can visit a thrift store or Goodwill store to find the plates and candlesticks that you need. You will need a couple of brass candle sticks and at least three vintage plates. You'll also want some superglue to hold it all together. It looks like the jewelry stand that your grandmother kept her treasured pieces in and it's absolutely gorgeous and really holds quite a few rings, earrings, and bracelets. Just sit it on the dresser or nightstand and keep all of your favorite pieces organized.

DIY Instructions and Project Credit – Acutedesigns

DIY Vintage Jewelry Stand

Framed Chicken Wire Jewelry Hanger

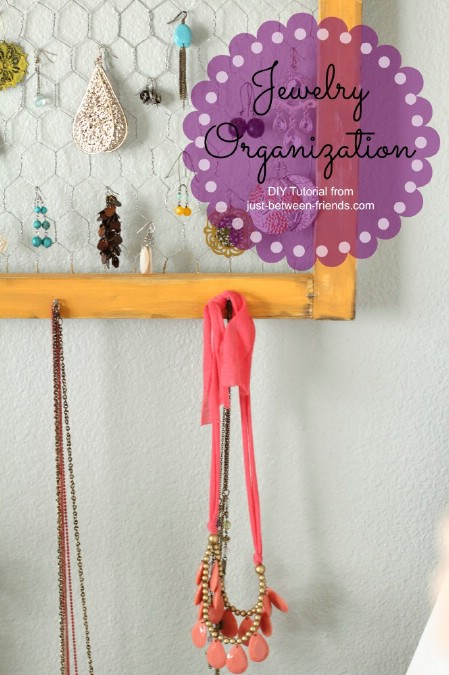
If you have a few pieces of chicken wire on hand, you can create an absolutely stunning hanger for your earrings and other jewelry. You'll need a one-by-two foot piece of chicken wire as well as a few pieces of wood to build the frame. The framed holder hangs with a piece of ribbon or whatever you want to use to hang it and it costs only about $2 to make. Plus, it's relatively easy and will hold loads of jewelry. Add a few small nails or hooks to the wooden part for holding necklaces and bracelets and your earrings will just hang across the wire in the center.

DIY Instructions and Project Credit – Just-between-friends

Framed Chicken Wire Jewelry Hanger

Deco Board Jewelry Hanger

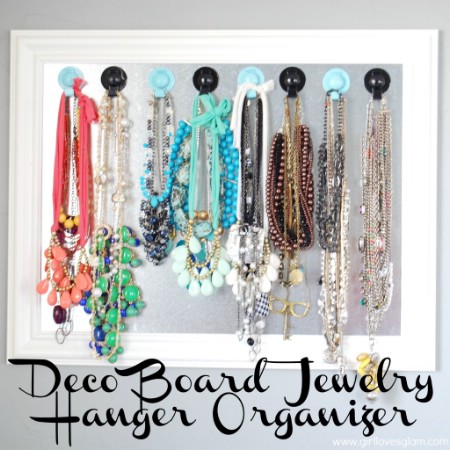
A magnetic board and a few magnetic hangers will give you the perfect place to hang and keep all of your jewelry organized. You can paint the board and the hangers to match your décor and they are perfect for holding necklaces and bracelets. The hangers are just a few dollars each at Wal-Mart and you can find the magnetic board at any office supply store. Or, if you have an old board that you aren't using, you're halfway there and you can just add the hangers to keep your jewelry within reach and untangled at all times.

DIY Instructions and Project Credit – Girllovesglam

Deco Board Jewelry Hanger

Embroidery Hoop Earring Display

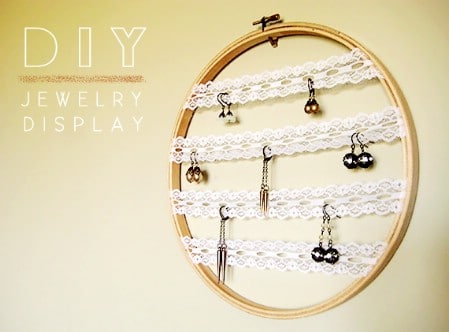
An old embroidery hoop and a few strips of lace give you the perfect place to hang and organize your earrings. You don't even have to glue this one. Just separate the hoop and place the lace ribbon inside before putting it all back together. The hoop hangs perfectly on the wall and you can add as much lace as you need to keep all of your earrings organized. It's beautiful, easy to make, and best of all, cheap. You can literally make one of these in about five minutes and if you have the hoop and lace on hand, it won't cost you anything. You could also use strips of fabric if that's what you have.

DIY Instructions and Project Credit – Bubbyandbean

Embroidery Hoop Earring Display

Cheese Grater Earring Display

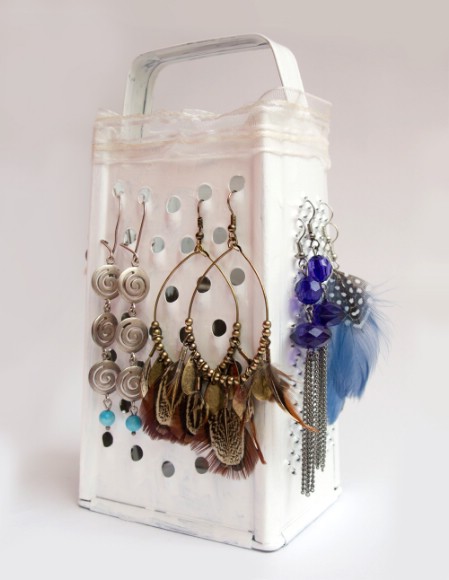
A cheese grater is the perfect earring holder. Now, we're talking about those full, standup graters that you can buy just about anywhere if you don't already have one that you can use. Paint over the metal if you want and add lace or whatever else you want to make it a bit more decorative. Then just stick your earring backs into the holes in the grater. Voila! Instant earring organization and it takes just a few minutes and won't cost anything if you have an old grater that you can use. Note that this one works best for hanging earrings.

DIY Instructions and Project Credit – Katrinshine

Cheese Grater Earring Display

Vintage China Jewelry Display

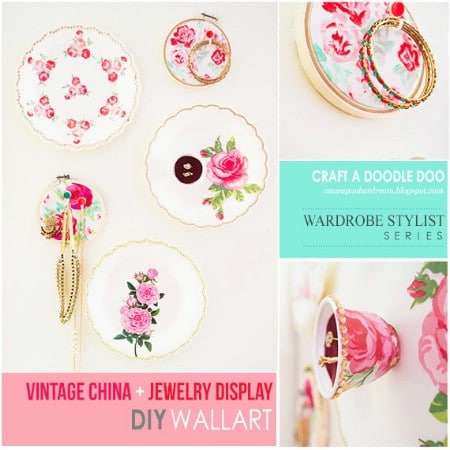
You can create an absolutely gorgeous jewelry display with a few cheap plastic plates and cups, some temporary tattoos and a few other supplies. The gist of this one is to make those cheap plates and cups look like vintage china, which is done with floral temporary tattoos. Once you have that accomplished, you can fill the cups with foam for sticking earrings and use command hooks or some decorate push pins on the plates to hold necklaces and bracelets. You really have to see this one. You'll find it hard to believe that they started out as cheap plastic.

DIY Instructions and Project Credit – Onceuponherdream

Vintage China Jewelry Display

Staircase Spindle Jewelry Holder

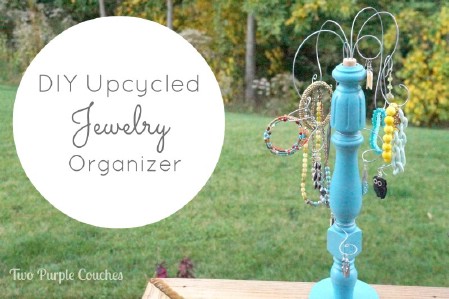
If you happen to be replacing your staircase spindle, you've got the makings for the perfect jewelry holder. Even if you don't have a spare spindle sitting around, you can pick them up really cheap at yard sales, flea markets, or any number of thrift stores. You'll need a round piece of wood to hold the spindle up and some wire for hanging your jewelry. This is a beautiful jewelry organizer that you can paint or stain any color you need to match your décor and it's really easy to make. The wires stick out in different places, giving you the perfect place for hanging all of your longer jewelry pieces.

DIY Instructions and Project Credit – Rainonatinroof

Staircase Spindle Jewelry Holder

Accordion Jewelry Holder

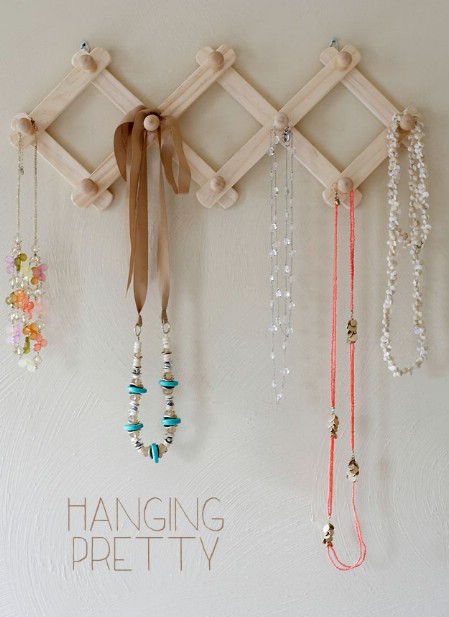
A wooden accordion rack is a great way to keep your jewelry organized and they are really cheap at the Dollar Store or Dollar Tree. You could also use plastic racks if that's what you want. You can paint or decorate them however you want and then just hang them on the wall to hold necklaces and bracelets. Stack a few of them up the wall to have somewhere to keep all of your longer pieces organized. They make the perfect jewelry organizers and they're really cheap, which is always a good thing. Plus, there's little work involved to turn them into jewelry holders.

DIY Instructions and Project Credit – Caughtonawhim

Accordion Jewelry Holder

Kids' Jewelry Organizer

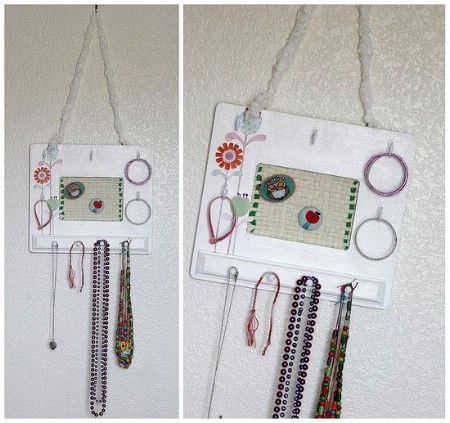
When you're organizing jewelry, you certainly can't forget about the little girls in your life. This kids' organizer is perfect for little necklaces and bracelets and it's very easy to make. You'll need wooden pegs and a frame, which you can get for around $1 each and something to fill in the center. We love the idea of using an old loom to create a place in the center for hanging earrings. This is a really easy project and one that your little one can help you to make and decorate. Just add a little paint or decoupage some pictures on the frame.

DIY Instructions and Project Credit – Tonyastaab

Kids' Jewelry Organizer